Schwarzgerät III: Difference between revisions
| (65 intermediate revisions by the same user not shown) | |||
| Line 4: | Line 4: | ||
My 2020 rebuild, [[Schwarzgerät_II|Schwarzgerät II]], was a beast of a machine. Like the Hubble or LHC, however, I had to give it more powah. The 2022 upgrade, Schwarzgerät III, does just that despite scrotumtightening supply chain madness. This rebuild focused on cooling, power, and aesthetics. I require that the machine be no louder than ambient noise (I live in the middle of [[Atlanta|Midtown Atlanta]]) when weakly loaded—I ought not hear the machine unless seriously engaged in active computation. At the same time, I want to overclock my 3970X as far as she can (reasonably) go. | My 2020 rebuild, [[Schwarzgerät_II|Schwarzgerät II]], was a beast of a machine. Like the Hubble or LHC, however, I had to give it more powah. The 2022 upgrade, Schwarzgerät III, does just that despite scrotumtightening supply chain madness. This rebuild focused on cooling, power, and aesthetics. I require that the machine be no louder than ambient noise (I live in the middle of [[Atlanta|Midtown Atlanta]]) when weakly loaded—I ought not hear the machine unless seriously engaged in active computation. At the same time, I want to overclock my 3970X as far as she can (reasonably) go. | ||
'''(further [[Schwarzgerät_III_upgrade|upgraded]] 2022-04, hopefully the last bit for a minute)''' | |||
<blockquote>“But out here, down here among the people, the truer currencies come into being.”―<i>''Gravity's Rainbow''</i> (1973)</blockquote> | <blockquote>“But out here, down here among the people, the truer currencies come into being.”―<i>''Gravity's Rainbow''</i> (1973)</blockquote> | ||
| Line 17: | Line 19: | ||
==Bill of materials== | ==Bill of materials== | ||
We're approaching the $10,000 mark before correcting for inflation, with hard drives alone representing close to $5,000. Materials in this build were acquired over a period going back to 2011 (the LSI Fusion SAS | We're approaching the $10,000 mark before correcting for inflation, with hard drives alone representing close to $5,000. Materials in this build were acquired over a period going back to 2011 (one of the LSI Fusion SAS cards is, I'm pretty certain, the component longest in my possession). This most recent iteration represents less than $2,000 of components, most of that being $1,150 for the 256GB of RAM (I did manage to sell my old RAM for $200, but we can't deduct that, unless we included its original cost). | ||
[[File:Caselabs-t10a-parts.jpg|right|400px|thumb|Parts for the Caselabs T10]] | |||
===Chassis=== | ===Chassis=== | ||
[[File:Fanmount.jpg|thumb|200px|4x140mm fan struts, designed in OpenSCAD and printed on my [[Voxel]].]] | [[File:Fanmount.jpg|thumb|200px|4x140mm fan struts, designed in OpenSCAD and printed on my [[Voxel]].]] | ||
| Line 31: | Line 33: | ||
* Self-designed and -printed case for RHElectronics Geiger counter ([https://github.com/dankamongmen/openscad-models/blob/master/geiger.scad source]) | * Self-designed and -printed case for RHElectronics Geiger counter ([https://github.com/dankamongmen/openscad-models/blob/master/geiger.scad source]) | ||
* Self-designed and -printed covering case for EKWB Quantum Kinetic FLT 240 mounting kit ([https://github.com/dankamongmen/openscad-models/blob/master/reservoir-part.scad source]) | * Self-designed and -printed covering case for EKWB Quantum Kinetic FLT 240 mounting kit ([https://github.com/dankamongmen/openscad-models/blob/master/reservoir-part.scad source]) | ||
* Self-designed and -printed cable | * Self-designed and -printed PCI brackets with cable channels ([https://github.com/dankamongmen/openscad-models/blob/master/bracketpci.scad source]) | ||
* Self-designed and -printed 4x140mm fan mount for roof ([https://github.com/dankamongmen/openscad-models/blob/master/140-interlocking.scad source]) | * Self-designed and -printed 4x140mm fan mount for roof ([https://github.com/dankamongmen/openscad-models/blob/master/140-interlocking.scad source]) | ||
* DEMCiflex magnetic dust filter pack for CaseLabs Magnum TH10 | * DEMCiflex magnetic dust filter pack for CaseLabs Magnum TH10 | ||
| Line 48: | Line 49: | ||
====Bespoke loop==== | ====Bespoke loop==== | ||
[[File:Bottom.jpg|200px|thumb|The bottom complexes | [[File:Bottom.jpg|200px|thumb|The bottom complexes suggest turbogenerators.]] | ||
* [https://www.ekwb.com/shop/ek-quantum-kinetic-flt-240-d5-pwm-d-rgb-plexi EKWB Quantum Kinetic FLT 240] D5 pump + reservoir with mounting brackets. Installed halfway up the case's back, outside. | * [https://www.ekwb.com/shop/ek-quantum-kinetic-flt-240-d5-pwm-d-rgb-plexi EKWB Quantum Kinetic FLT 240] D5 pump + reservoir with mounting brackets. Installed halfway up the case's back, outside. | ||
** EK Laing PWM D5 pump installed into the Quantum Kinetic. | ** EK Laing PWM D5 pump installed into the Quantum Kinetic. | ||
** [https://shop.bitspower.com/index.php?route=product/product&product_id=1963 Bitspower BP-MBWP-CT] | ** [https://shop.bitspower.com/index.php?route=product/product&product_id=1963 Bitspower BP-MBWP-CT] G¼-10K temperature sensor. Installed in Quantum FLT's central front plug, running to motherboard's first external temp sensor. | ||
* [http://monsooncooling.com/reservoir.php Monsoon MMRS Series II] D5 pump housing + reservoir with 2x Silver Bullet biocide | * [http://monsooncooling.com/reservoir.php Monsoon MMRS Series II] D5 pump housing + reservoir with 2x Silver Bullet biocide G¼ plugs. Installed at the front bottom of the case, in the lowest two 5.25" bays. | ||
** EK Laing Vario D5 pump installed into the Monsoon. | ** EK Laing Vario D5 pump installed into the Monsoon. | ||
** [https://www.xs-pc.com/temperature-sensors/g14-plug-with-10k-sensor-black-chrome XS-PC] | ** [https://www.xs-pc.com/temperature-sensors/g14-plug-with-10k-sensor-black-chrome XS-PC] G¼-10K temperature sensor. Installed in Monsoon's upper left plug, running to Corsair iCUE Commander Core XT's first external temp sensor. | ||
* [https://www.amazon.com/DIYhz-displaydigital-Thermometer-Temperature-Indicator/dp/B09QG3241X DiyHZ aluminum shell] flowmeter and temperature sensor. LCD screen displays both values, and a 3-pin connector carries away flow information. | * [https://www.amazon.com/DIYhz-displaydigital-Thermometer-Temperature-Indicator/dp/B09QG3241X DiyHZ aluminum shell] flowmeter and temperature sensor. LCD screen displays both values, and a 3-pin connector carries away flow information. | ||
* [https://www.ekwb.com/shop/ek-quantum-momentum-trx40-aorus-master-d-rgb-plexi EKWB Aorus Master TRX40] DRGB monoblock (nickel+plexi). | * [https://www.ekwb.com/shop/ek-quantum-momentum-trx40-aorus-master-d-rgb-plexi EKWB Aorus Master TRX40] DRGB monoblock (nickel+plexi). | ||
* [https://www.ekwb.com/shop/ek-quantum-vector-rtx-re-d-rgb-nickel-plexi EKWB EK-Quantum Vector RTX RE] DRGB waterblock (nickel+plexi). | * [https://www.ekwb.com/shop/ek-quantum-vector-rtx-re-d-rgb-nickel-plexi EKWB EK-Quantum Vector RTX RE] DRGB waterblock (nickel+plexi). | ||
* [http://hardwarelabs.com/nemesis/gtr/gtr-360/ Hardware Labs Black Ice Nemesis GTR360] 16 FPI 54.7mm radiator, mounted to top PSU side. | * [http://hardwarelabs.com/nemesis/gtr/gtr-360/ Hardware Labs Black Ice Nemesis GTR360] 16 FPI 54.7mm radiator, mounted to top PSU side (393x133mm). | ||
* [https://hardwarelabs.com/blackice/gts/gts-360/ Hardware Labs Black Ice Nemesis GTS360] 30 FPI 29.6mm radiator, mounted to top motherboard side. | * [https://hardwarelabs.com/blackice/gts/gts-360/ Hardware Labs Black Ice Nemesis GTS360] 30 FPI 29.6mm radiator, mounted to top motherboard side (397x133mm). | ||
* 2x [http://hardwarelabs.com/nemesis/gtsxflow/240gts-xflow/ Hardware Labs Black Ice Nemesis GTS240 XFLOW] 16 FPI 29.6mm crossflow radiators, mounted to bottoms. | * 2x [http://hardwarelabs.com/nemesis/gtsxflow/240gts-xflow/ Hardware Labs Black Ice Nemesis GTS240 XFLOW] 16 FPI 29.6mm crossflow radiators, mounted to bottoms (292x133mm). | ||
* Fancasee 1-to-4 PWM splitter, power from header | * Fancasee 1-to-4 PWM splitter, power from header | ||
* Silverstone 8-way PWM splitter, SATA power | * [[SilverStone_fan_hub|Silverstone 8-way]] PWM splitter, SATA power | ||
* 12.5mm ID EKWB [https://www.ekwb.com/shop/ek-tube-zmt-matte-black-19-4-12-5mm ZMT], black | * 12.5mm ID EKWB [https://www.ekwb.com/shop/ek-tube-zmt-matte-black-19-4-12-5mm ZMT], black | ||
Most calculations will require knowing the total amount of coolant in our system. Fluid volumes of liquid cooling components are irritatingly difficult to establish (once the hardware is installed, anyway). With an inner diameter of 12.5mm, the ZMT has a cross-section of 122.72mm² ( | Most calculations will require knowing the total amount of coolant in our system. Fluid volumes of liquid cooling components are irritatingly difficult to establish (once the hardware is installed, anyway). With an inner diameter of 12.5mm, the ZMT has a cross-section of 122.72mm² (1.2272cm²). I got the EKWB fluid volumes directly from their support channel. G¼ has a diameter of 13.157mm, but that doesn't tell you anything about the inner diameter, which is not standardized =\. I used a graduated cylinder to measure the Monsoon and the radiators. Attachments can be considered 1--2mL each (a drain structure including a ball valve attachment, a T attachment, a 90° adapter and several extenders contained a total of 10mL). | ||
{| class="wikitable" | {| class="wikitable" | ||
! Component !! Volume (mL) !! Climb (m) !! θ (rad) | ! Component !! Volume (mL) !! Climb (m) !! θ (rad) | ||
|- | |- | ||
| HWL XFLOW 240 || | | HWL XFLOW 240 || 90 || 0 || 0 | ||
|- | |- | ||
| Tubing || ? || 0 || 0 | | Tubing || ? || 0 || 0 | ||
|- | |- | ||
| HWL GTR360 || | | HWL GTR360 || 320 || 0 || 0 | ||
|- | |- | ||
| Tubing || ? || 0 || 0 | | Tubing || ? || 0 || 0 | ||
|- | |- | ||
| HWL GTS360 || | | HWL GTS360 || 130 || 0 || 0 | ||
|- | |- | ||
| Tubing || 44 || || | | Tubing || 44 || || | ||
|- | |- | ||
| Aorus Master | | Aorus Master monoblock || 45 || || π/2 | ||
|- | |- | ||
| Tubing || 11 || || | | Tubing || 11 || || | ||
|- | |- | ||
| EK-Vector waterblock || 50 || || π/2 | | EK-Vector waterblock || 50 || || π/2 | ||
| Line 94: | Line 95: | ||
| Tubing || 28 || || | | Tubing || 28 || || | ||
|- | |- | ||
| | | DiyHZ flowmeter || 4 || || π/4 | ||
|- | |- | ||
| HWL XFLOW 240 || | | HWL XFLOW 240 || 90 || 0 || 0 | ||
|- | |- | ||
| Tubing || 11 || 0 || 0 | | Tubing || 11 || 0 || 0 | ||
|- | |- | ||
| Monsoon Series Two D5 || | | Monsoon Series Two D5 || 300 || 0 || 0 | ||
|- | |- | ||
| Tubing || ? || 0 || 0 | | Tubing || ? || 0 || 0 | ||
| Line 108: | Line 109: | ||
Note that water expands (becomes less dense) as it heats (down to 4℃, where it begins to do the opposite), meaning more pressure on its container. The coefficient of volume expansion β(1/℃) for water is 0.00021 at 20℃. This would suggest that a 96℃ rise would result in about a 2% expansion in the total volume, but this is incorrect, due to a changing β over temperature. By the time you get to 60℃ (most tubing isn't rated beyond this temperature), you've got a β closer to 0.0005. Here's the data for pure water at one atmosphere: | Note that water expands (becomes less dense) as it heats (down to 4℃, where it begins to do the opposite), meaning more pressure on its container. The coefficient of volume expansion β(1/℃) for water is 0.00021 at 20℃. This would suggest that a 96℃ rise would result in about a 2% expansion in the total volume, but this is incorrect, due to a changing β over temperature. By the time you get to 60℃ (most tubing isn't rated beyond this temperature), you've got a β closer to 0.0005. Here's the data for pure water at one atmosphere: | ||
{|class="wikitable" | {|class="wikitable" | ||
! ℃ !! Density kg/m³ !! Specific weight kN/m³ !! Co. of thermal expansion β 10⁻⁶/K | ! ℃ !! Density kg/m³ !! Specific weight kN/m³ !! Co. of thermal expansion β 10⁻⁶/K | ||
| Line 142: | Line 142: | ||
* 2x EK Vardar PWM on GTR360 | * 2x EK Vardar PWM on GTR360 | ||
* Noctua NF-P12 PWM on GTR360 | * Noctua NF-P12 PWM on GTR360 | ||
{| class="wikitable" | |||
! Fan !! Location !! Watts !! db(A) !! CFM !! Pressure | |||
|- | |||
| NF-F12 (2) || GTS360 || 0.6 (1.2) || 22.4 (25.4) || 93.4 (186.8) || 2.61 (5.22) | |||
|- | |||
| NF-F12 iPPC-2000 || GTS360 || 1.2 || 29.7 || 121.8 || 3.94 | |||
|- | |||
| NF-A12x25 (2) || GTS240 || 1.68 (3.36) || 22.6 (25.6) || 102.1 (204.2) || 2.34 (4.68) | |||
|- | |||
| NF-P12 redux-1700 (2) || GTS240 || 1.08 (2.16) || 25.1 (28.1) || 120.2 (240.4) || 2.83 (5.66) | |||
|- | |||
| EK Vardar (2) || GTR360 || 2.16 (4.32) || 33.5 (36.5) || 77 (154) || 3.16 (6.32) | |||
|- | |||
| NF-P12 || GTR360 || 0.6 || 19.8 || 120.2 || 2.83 | |||
|- | |||
|} | |||
====Blowing in==== | ====Blowing in==== | ||
| Line 149: | Line 166: | ||
* 2x Noctua NF-S12A PWM on lower two drive cages | * 2x Noctua NF-S12A PWM on lower two drive cages | ||
* Noctua NF-S12A FLX on top drive cage | * Noctua NF-S12A FLX on top drive cage | ||
All values are maxima: | |||
{| class="wikitable" | |||
! Fan !! Location !! Watts !! db(A) !! CFM !! Pressure | |||
|- | |||
| NF-S12A (3) || Drive cages || 1.44 (4.32) || 17.8 (22.6) || 107.5 (322.5) || 1.19 (3.57) | |||
|- | |||
| NF-F12 iPPC-2000 || Flex-Bay || 1.2 || 29.7 || 121.8 || 3.94 | |||
|- | |||
| NF-F12 iPPC-3000 || Bottom cage || 3.6 || 43.5 || 186.7 || 7.63 | |||
|- | |||
| NF-A8 || 3.5" bay || 0.96 || 17.7 || 55.5 || 2.37 | |||
|- | |||
|} | |||
===Compute=== | ===Compute=== | ||
| Line 159: | Line 190: | ||
* [https://www.evga.com/products/specs/gpu.aspx?pn=1207a8ec-269d-4e11-91a9-e01226652c9f EVGA GeForce RTX 2070 SUPER] Black Gaming 6GB GDDR6 with NVIDIA TU104 GPU. Installed in topmost PCIe 4.0 16x slot, though this is only a 3.0 card. | * [https://www.evga.com/products/specs/gpu.aspx?pn=1207a8ec-269d-4e11-91a9-e01226652c9f EVGA GeForce RTX 2070 SUPER] Black Gaming 6GB GDDR6 with NVIDIA TU104 GPU. Installed in topmost PCIe 4.0 16x slot, though this is only a 3.0 card. | ||
* [https://www.elegoo.com/products/elegoo-mega-2560-r3-board ELEGOO MEGA 2560] Revision 3, connected to NXZT internal USB hub, mounted to back of PSU chamber | * [https://www.elegoo.com/products/elegoo-mega-2560-r3-board ELEGOO MEGA 2560] Revision 3, connected to NXZT internal USB hub, mounted to back of PSU chamber | ||
As I detailed regarding [[Schwarzgerat II]], the 3990X is an amazing achievement in chip design and fabrication, but I believe it to be severely starved for many tasks by its memory bandwidth; with its four memory channels populated, the ThreadRipper 3990X can hit about 90GB/s from fast DDR4; its | As I detailed regarding [[Schwarzgerat II]], the 3990X is an amazing achievement in chip design and fabrication, but I believe it to be severely starved for many tasks by its memory bandwidth; with its four memory channels populated, the ThreadRipper 3990X can hit about 90GB/s from fast DDR4; its EPYC brother can pull down ~190 through its eight channels. For my tasks, it's rare enough that I can drive all my 32 cores; with the 3990X, I'd be paying twice as much to hit full utilization less often, and be unable to bring full bandwidth to bear when I did. | ||
I absolutely 🖤 my 3970X, though. Bitch screams. Anyone overclocking on Linux should be aware of [https://www.linux.org/docs/man8/turbostat.html turbostat]. | I absolutely 🖤 my 3970X, though. Bitch screams. Anyone overclocking on Linux should be aware of [https://www.linux.org/docs/man8/turbostat.html turbostat]. The 3970X supports 88 lanes of PCIe 4.0, of which the TRX40 chipset consumes 24, leaving 64 for expansion devices. I've got 16 (GPU) + 16 (Hyper X) + 2x8 (LSI cards) + 12 (M.2 onboards) for 60 total, coming in just under saturation. | ||
===Power=== | ===Power=== | ||
| Line 175: | Line 205: | ||
* 2x 4-way SATA expanders | * 2x 4-way SATA expanders | ||
* 2x [https://www.amazon.com/BANKEE-Converter-Voltage-Regulator-Transformer/dp/B08NZSYZRF Bankee 12V->5V/15A] buck transformers | * 2x [https://www.amazon.com/BANKEE-Converter-Voltage-Regulator-Transformer/dp/B08NZSYZRF Bankee 12V->5V/15A] buck transformers | ||
To make a lengthy story short (it's told in much more detail below), I needed more SATA power cables than my PSU supported. The buck transformers are used to convert the 12V on PCIe cables to 5V+12V as needed by SATA drives. | |||
===Storage=== | ===Storage=== | ||
[[File:Hacksawed.jpg|thumb|200px|Cut down that drive cage!]] | [[File:Hacksawed.jpg|thumb|200px|Cut down that drive cage!]] | ||
* 14x Seagate Exos X18 18TB 7200 rpm SATA III drives in striped raidz2 | * 14x Seagate Exos X18 18TB 7200 rpm SATA III drives in striped raidz2 | ||
* Asus HyperX 4x M.2 PCIe 3.0 x16 | * Asus HyperX 4x M.2 PCIe 3.0 x16 | ||
| Line 192: | Line 218: | ||
* 4x CableDeconn SAS-to-4xSATA cables for use with LSI Fusions | * 4x CableDeconn SAS-to-4xSATA cables for use with LSI Fusions | ||
* 2x CableDeconn 4x SATA cables for use with motherboard | * 2x CableDeconn 4x SATA cables for use with motherboard | ||
I love the [http://www.cabledeconn.com/Mini-SAS-Series-/SATA-Esata-list-138-160.html CableDeconn bunched SATA] data cables; they're definitely the only way to fly (assuming lack of SATA backplanes, which good luck in a workstation form factor). We end up with 4x 3.5 drives in the bay, 10x 3.5 drives in CaseLabs cages in the PSU side, 3x M.2 devices in the motherboard PCIe 4.0 slots, and 2x M.2 devices in the HyperX card. This leaves room for 2 more M.2s in the card, and 4x 2.5 devices in the smaller bay. The bottom 2 slots in the bottom hard drive cage are blocked by the PSU-side radiator; indeed, I had to take a hacksaw to said cage to get it into the machine. | |||
How to arrange 14 disks so as to create a single volume? I don't bother with solutions involving hot spares: | |||
{| class="wikitable" | |||
! Name !! Setup !! Availability !! MaxTol !! MinFail !! Max Rebuild | |||
|- | |||
| raid3z | |||
| 11 data, 3 parity | |||
| 78.6% (11) | |||
| 3 | |||
| 4 | |||
| 100% + fail | |||
|- | |||
| raid2z | |||
| 12 data, 2 parity | |||
| 85.7% (12) | |||
| 2 | |||
| 3 | |||
| 85.7% + fail | |||
|- | |||
| striped raid3z | |||
| 2x(4 data, 3 parity) | |||
| 57.1% (8) | |||
| 3 + 3 | |||
| 4 | |||
| 50% + fail | |||
|- | |||
| striped raid2z | |||
| 2x(5 data, 2 parity) | |||
| 71.4% (10) | |||
| 2 + 2 | |||
| 3 | |||
| 50% + fail | |||
|- | |||
| striped raidz | |||
| 2x(6 data, 1 parity) | |||
| 85.7% (12) | |||
| 1 + 1 | |||
| 2 | |||
| 50% + fail | |||
|- | |||
| mirrored raid3z | |||
| 2x(4 data, 3 parity) | |||
| 28.6% (4) | |||
| 7 + 3 | |||
| 8 | |||
| 50% + fail | |||
|- | |||
| mirrored raid2z | |||
| 2x(5 data, 2 parity) | |||
| 35.7% (5) | |||
| 7 + 2 | |||
| 6 | |||
| 50% + fail | |||
|- | |||
| mirrored raidz | |||
| 2x(6 data, 1 parity) | |||
| 42.9% (6) | |||
| 7 + 1 | |||
| 4 | |||
| 50% + fail | |||
|- | |||
| raidz3 of stripes | |||
| 7x(2) 4 data, 3 parity | |||
| 57.1% (8) | |||
| 2 + 2 + 2 | |||
| 4 | |||
| 100% + fail | |||
|- | |||
| raidz2 of stripes | |||
| 7x(2) 5 data, 2 parity | |||
| 71.4% (10) | |||
| 2 + 2 | |||
| 3 | |||
| 85.7% + fail | |||
|} | |||
I went with a striped raidz2 for my 14 Exos drives (also known as a RAID60 in the Old English), yielding 180TB usable from 252TB total (71.4%). I suffer data loss if I lose any combination of 5 drives, and can lose data if I lose certain combinations of 3 drives (any combination where all three lost drives are in the same raid2z), but no rebuild ever involves more than seven drives. All filesystems are ZFS, and all storage enjoys some redundancy (save the 16GB Optane, which is just for persistent memory/DAX experiments). I could have split the volume and had two raidz2s with no interdependence, but eh. | |||
===Interfaces=== | ===Interfaces=== | ||
| Line 197: | Line 303: | ||
* NXZT internal USB 2.0 hub, magnetically attached to underside of PSU, connected to motherboard USB 2.0 header | * NXZT internal USB 2.0 hub, magnetically attached to underside of PSU, connected to motherboard USB 2.0 header | ||
* [https://rhelectronics.net/store/radiation-detector-geiger-counter-diy-kit-second-edition.html RHElectronics] Geiger counter, wired via 3 pins to 2560 MEGA, mounted to back of PSU chamber | * [https://rhelectronics.net/store/radiation-detector-geiger-counter-diy-kit-second-edition.html RHElectronics] Geiger counter, wired via 3 pins to 2560 MEGA, mounted to back of PSU chamber | ||
* [https://www.corsair.com/us/en/Categories/Products/Accessories-%7C-Parts/CORSAIR-iCUE-COMMANDER-CORE-XT-Smart-RGB-Lighting-and-Fan-Speed-Controller Corsair ICUE Commander Core XT] RGB/fan controller, mounted in top, connected to NXZT internal USB hub | * [https://www.corsair.com/us/en/Categories/Products/Accessories-%7C-Parts/CORSAIR-iCUE-COMMANDER-CORE-XT-Smart-RGB-Lighting-and-Fan-Speed-Controller Corsair ICUE Commander Core XT] RGB/fan controller, mounted in top, connected to NXZT internal USB hub | ||
* Monsoon CCFL 12V inverter, mounted to top, powered via SATA power connector attached to 12V Molex attached to video power line | * Monsoon CCFL 12V inverter, mounted to top, powered via SATA power connector attached to 12V Molex attached to video power line | ||
* GY-521 board for [http://invensense.com/mems/gyro/documents/PS-MPU-6000A-00v3.4.pdf MPU 6050] accelerometer + gyro, wired via 8 pins to 2560 MEGA, mounted to back of PSU chamber | * GY-521 board for [http://invensense.com/mems/gyro/documents/PS-MPU-6000A-00v3.4.pdf MPU 6050] accelerometer + gyro, wired via 8 pins to 2560 MEGA, mounted to back of PSU chamber | ||
| Line 204: | Line 310: | ||
===Lighting=== | ===Lighting=== | ||
* 4x Corsair ARGB LED lines, connected in series to Corsair Commander Core, attached via adhesive around | * 4x Corsair 410mm ARGB LED lines, connected in series to Corsair Commander Core, attached via adhesive around bottom cooling complex of the motherboard side. | ||
* 2x 12V RGB LED lines, backlighting top radiators, attached to motherboard's top RGB header via 1-to-2 RGB splitter. | * 2x 12V RGB LED lines, backlighting top radiators, attached to motherboard's top RGB header via 1-to-2 RGB splitter. | ||
* | * 5x green PerformancePCs CCFL rods, attached to Monsoon DC->AC inverter, mounted to back inner corner of each chamber. | ||
* ARGB lines on EVGA Quantum FLT and Aorus Master monoblock, attached to motherboard's top and bottom ARGB headers respectively. | * ARGB lines on EVGA Quantum FLT and Aorus Master monoblock, attached to motherboard's top and bottom ARGB headers respectively. | ||
* RGB tops on Rage DIMMs are unmanaged, and self-synchronize via infrared. | * RGB tops on Rage DIMMs are unmanaged, and self-synchronize via infrared. | ||
| Line 212: | Line 318: | ||
* Piratedog [https://piratedog.tech/collections/rgb-splitters/products/corsair-rgb-lighting-channel-splitter Corsair RGB] 1-to-2 splitter | * Piratedog [https://piratedog.tech/collections/rgb-splitters/products/corsair-rgb-lighting-channel-splitter Corsair RGB] 1-to-2 splitter | ||
* EZDIY-Fab [https://www.amazon.com/gp/product/B09HGP9YMK/ref=ppx_yo_dt_b_asin_title_o03_s00?ie=UTF8&psc=1 ARGB LED] strips | * EZDIY-Fab [https://www.amazon.com/gp/product/B09HGP9YMK/ref=ppx_yo_dt_b_asin_title_o03_s00?ie=UTF8&psc=1 ARGB LED] strips | ||
I currently have no window on my PSU side, so there's no point putting lighting in there. I do have a short strip of 12V LEDs just in case I need to work in there without light (though presumably with the machine on). I'd like to get these on a switch or something. Ideally both these and the CCFLs would be on a switch with a battery backup. I'm sad that I bought into the Corsair ecosystem. It's almost entirely closed and proprietary, even the connectors. Props to [https://piratedog.tech/ PirateDog Tech] for working around this. | |||
==Distributing power== | ==Distributing power== | ||
[[File:Tobsun.jpg|200px|thumb|A 12V->5V buck transformer | [[File:Tobsun.jpg|200px|thumb|A 12V->5V buck transformer, more efficient than a mere voltage regulator.]] | ||
I began to run into some serious power issues on this build, originating in the Exos X18 drives (of which, you might remember, there are 14). It will be worth your time to consult the [https://www.seagate.com/www-content/product-content/enterprise-hdd-fam/exos-x18/_shared/en-us/docs/100865854a.pdf Exos 18 manual]. Remember, 12V is for the motor, and 5V is for the logic. | I began to run into some serious power issues on this build, originating in the Exos X18 drives (of which, you might remember, there are 14). It will be worth your time to consult the [https://www.seagate.com/www-content/product-content/enterprise-hdd-fam/exos-x18/_shared/en-us/docs/100865854a.pdf Exos 18 manual]. Remember, 12V is for the motor, and 5V is for the logic. | ||
| Line 237: | Line 345: | ||
[schwarzgerat](0) $ sudo pwrstat -status | [schwarzgerat](0) $ sudo pwrstat -status | ||
Model Name................... CP1500PFCLCD | Model Name................... CP1500PFCLCD | ||
Rating Voltage............... 120 V | Rating Voltage............... 120 V | ||
Rating Power................. 900 Watt | Rating Power................. 900 Watt | ||
| Line 248: | Line 355: | ||
Load......................... 333 Watt(37 %) | Load......................... 333 Watt(37 %) | ||
Line Interaction............. None | Line Interaction............. None | ||
Last Power Event............. Blackout at 2020/03/08 19:16:10 for 24 sec. | Last Power Event............. Blackout at 2020/03/08 19:16:10 for 24 sec. | ||
[schwarzgerat](0) $ | [schwarzgerat](0) $ | ||
| Line 261: | Line 367: | ||
<li>Molex (12V only): 2 (pumps)</li> | <li>Molex (12V only): 2 (pumps)</li> | ||
<li>Molex (5V only): 2 (flowmeter, USB hub)</li> | <li>Molex (5V only): 2 (flowmeter, USB hub)</li> | ||
<li>SATA (12V+5V): | <li>SATA (12V+5V): 13 (10 disks, 2 for StarTech bay, 1 for IcyDock bay)</li> | ||
<li>SATA (12V only): 2 (inverter, fan controller)</li> | <li>SATA (12V only): 2 (inverter, fan controller)</li> | ||
<li>SATA (5V only): | <li>SATA (5V only): 3 (USB front bays, Corsair)</li> | ||
<li>PCIe: 1 (GPU)</li> | <li>PCIe: 1 (GPU)</li> | ||
<li>3-pin ARGB: 4 (ARGB headers, 5A each)</li> | <li>3-pin ARGB: 4 (ARGB headers, 5A each)</li> | ||
| Line 270: | Line 376: | ||
</ul> | </ul> | ||
I got these numbers from product documentation or, in the case of the EKWB LEDs, from the manufacturer's support channel. | I got these numbers from product documentation or, in the case of the EKWB LEDs, from the manufacturer's support channel. Corsair LED strip information came from [https://forum.corsair.com/forums/topic/155937-corsair-rgb-current-usage/#comment-917706 PirateDog Tech]. The Corsair iCUE Commander XT is rated for a maximum of 4.5A total. | ||
{| class="wikitable" | {| class="wikitable" | ||
! Item !! 5V watts !! 12V watts !! Source | ! Item !! 5V watts !! 12V watts !! Source | ||
| Line 311: | Line 417: | ||
|- | |- | ||
| Monsoon inverter || 0 || ? || SATA | | Monsoon inverter || 0 || ? || SATA | ||
|- | |||
| Monsoon LEDs || 0 || ? || Molex | |||
|- | |- | ||
| Exos18 (x14) (spinning) || 4.6 (64.4) || 7.68 (107.52)|| SATA | | Exos18 (x14) (spinning) || 4.6 (64.4) || 7.68 (107.52)|| SATA | ||
| Line 319: | Line 427: | ||
|- | |- | ||
| EKWB Aorus TRX40 Monoblock LEDs || 1.05 || 0 || ARGB header | | EKWB Aorus TRX40 Monoblock LEDs || 1.05 || 0 || ARGB header | ||
|- | |||
| DiyHZ light strips || ? || 0 || ARGB header | |||
|- | |- | ||
| Corsair Commander Pro XT (logic) || ? || 0 || SATA | | Corsair Commander Pro XT (logic) || ? || 0 || SATA | ||
|- | |- | ||
| Corsair LED strips (x4) || | | Corsair LED strips (x4) || 1.835 (7.34) || 0 || Corsair (SATA) | ||
|- | |- | ||
| DiyHZ flowmeter || ? || 0 || Molex | | DiyHZ flowmeter || ? || 0 || Molex | ||
| Line 337: | Line 447: | ||
|- | |- | ||
|} | |} | ||
The Silverstone supports draws up to 4.5A (54W). The Corsair supports a 12V fan draw of 4.5A (54W) and a 5V RGB draw of 4.5A (22.5W). | |||
The PSU claims support of up to 100W as 5V (20A), and up to 850W as 12V (71A). The 5V line is dominated by hard drives, which will consume 65W when in active use (and 70W when spinning up). Beyond them, there are very few 5V draws; the ARGB light strips are going through the motherboard's ARGB headers, the internal USB hub and downstream devices are getting 5V from Molex, and the Corsair is pulling over SATA. Even if the motherboard ARGB headers are fed by the ATX12V's 5V lines, we're talking 20W max, and probably less than that. | |||
We're all clear on 12V until overclocking comes into play. The GPU and CPU will never be maxed out while the drives are spinning up (provided that we don't spin down the motors after startup), so the drives will be consuming 107W instead of 339W. The stock CPU+GPU are 495W, 46W for pumps, and some unknown but substantial amount is consumed by the motherboard; let's estimate a very generous 100W. That's 748W total. With 750W left after 100W are devoted to 5W, we're cutting it close, but that ought be a rare load. In practice, the machine tends to take about 300W in everyday use, up to about 600W under computational load; to really push the envelope, I'd need force heavy computational <i>and</i> I/O load. I'll see what happens next time I build a kernel while my ZFS is rebuilding. | |||
===The drive problem=== | ===The drive problem=== | ||
| Line 372: | Line 488: | ||
We have six remaining items requiring 5V power: the flowmeter, the Corsair, the internal USB hub, and the three front panel USB bays. Of these, three natively want Molex 4-pin, and the other 3 want SATA. Combined with our 14 drives, that's 20 power drains. | We have six remaining items requiring 5V power: the flowmeter, the Corsair, the internal USB hub, and the three front panel USB bays. Of these, three natively want Molex 4-pin, and the other 3 want SATA. Combined with our 14 drives, that's 20 power drains. | ||
I | I initially solved this problem using PUIS (Power-Up In Standby), a feature of the SATA specification. Enabling this feature on a disk will prevent it from spinning up until it receives a particular command, which can be issued by the OS (so long as you don't need your system firmware to recognize the disk, which will be unreadable until this command is sent). This had the downside of requiring me to keep my disks spinning once the machine had started, since I'd otherwise run into the problem anew should they all spin back up at the same time. | ||
I at first intended to solve this with 12V relays (or better yet, an [https://www.crowdsupply.com/sequent-microsystems/8-mosfet 8-MOSFET]) controlled by the Arduino, but instead used two 12V->5V buck transformers, splice the 12V line of my remaining PCIe cables (see below), and made myself underpowered 4-pin Molex cables from them. Each PCIe cable and its 66W of 12V is good for three drives when taken through three Molex-to-SATA adapters. | |||
===Power sources=== | ===Power sources=== | ||
| Line 384: | Line 502: | ||
| Perif (Molex) || 0 || 55 || 132 || Can bridge to SATA or PCIe. Wiring might not be safe for the full pin capacity. | | Perif (Molex) || 0 || 55 || 132 || Can bridge to SATA or PCIe. Wiring might not be safe for the full pin capacity. | ||
|- | |- | ||
| PCIe x4|| | | PCIe x4|| 0 || 0 || 75 || Can bridge to (underpowered) 12V-only (2-pin) Molex. Can probably bridge (with buck transformer) to underpowered Molex. | ||
|- | |- | ||
|} | |} | ||
| Line 414: | Line 532: | ||
==Regrets and stupidities== | ==Regrets and stupidities== | ||
[[File:Stupidgpu.jpg|200px|thumb|There are at least two reasons why this GPU's waterblock configuration is suboptimal.]] | [[File:Stupidgpu.jpg|200px|thumb|There are at least two reasons why this GPU's waterblock configuration is suboptimal.]] | ||
* I ought have wrapped all the tubing in anti-kink coils | * I ought have wrapped all the tubing in anti-kink coils (which I already had!) way earlier. | ||
* I ought have bought a second LSI SAS card from the outset, rather than going through two POS chinesium 1x cards, both of which continuously reset attached disks (I'm guessing due to my fairly lengthy cables? who knows). | * I ought have bought a second LSI SAS card from the outset, rather than going through two POS chinesium 1x cards, both of which continuously reset attached disks (I'm guessing due to my fairly lengthy cables? who knows). | ||
* I ought have paid more attention to which fans I was putting on which radiators. | * I ought have paid more attention to which fans I was putting on which radiators. | ||
| Line 442: | Line 560: | ||
<li>Replace the 45-degree adapter connecting the flowmeter to the radiator with a 90-degree adapter. This will lower the flowmeter, putting its output near its original location, eliminating any tubing length gains.</li> | <li>Replace the 45-degree adapter connecting the flowmeter to the radiator with a 90-degree adapter. This will lower the flowmeter, putting its output near its original location, eliminating any tubing length gains.</li> | ||
</ol> | </ol> | ||
The reservoir will be raised no more than the height of the fan being added to the radiator; it will likely move from the bottom bay to the bay immediately above that. Essentially, we're raising the entire floor of our cooling system by one fan's height. I'll be using Phanteks T30-120s, so that's 30mm. We could theoretically move everything higher with a shroud around these fans, but it would make working on the machine a goddamn nightmare. | The reservoir will be raised no more than the height of the fan being added to the radiator; it will likely move from the bottom bay to the bay immediately above that. Essentially, we're raising the entire floor of our cooling system by one fan's height. I'll be using [[Phanteks|Phanteks T30-120s]], so that's 30mm. We could theoretically move everything higher with a shroud around these fans, but it would make working on the machine a goddamn nightmare. | ||
When I do this, I'll likely raise the Vario pump's setting from 2 to 3. I might even replace the Vario pump with a proper PWM one. It would also be a fine time to [https://kampidh.blogspot.com/2019/11/down-rabbit-hole-d5-pwm-pump-flaw-and.html fix my other D5] so it reports tach properly. | When I do this, I'll likely raise the Vario pump's setting from 2 to 3. I might even replace the Vario pump with a proper PWM one. It would also be a fine time to [https://kampidh.blogspot.com/2019/11/down-rabbit-hole-d5-pwm-pump-flaw-and.html fix my other D5] so it reports tach properly. | ||
==Ongoing issues== | ==Ongoing issues== | ||
* My flow rate is lower than I would like, assuming this flowmeter to be reliable. Maxing out the PWM pump hits desirable flow rates, but with more noise than I want. I think there might be some flow reduction in the tubing between the flowmeter and Quantum Kinetic; I'm considering replacing that with hardline. For all I know, there's still a big air pocket in some radiator. | * <s>My flow rate is lower than I would like, assuming this flowmeter to be reliable. Maxing out the PWM pump hits desirable flow rates, but with more noise than I want. I think there might be some flow reduction in the tubing between the flowmeter and Quantum Kinetic; I'm considering replacing that with hardline. For all I know, there's still a big air pocket in some radiator.</s> <b>there was indeed a big air pocket</b> | ||
* <s>My onboard Ethernet stopped working, and I'm still not sure why.</s> <b>the ethernet cable wasn't plugged into the outlet all the way, lol, you dumb idiot</b> | * <s>My onboard Ethernet stopped working, and I'm still not sure why.</s> <b>the ethernet cable wasn't plugged into the outlet all the way, lol, you dumb idiot</b> | ||
* <s>I'm getting a kernel oops in the igb driver on startup, not sure why.</s> | * <s>I'm getting a kernel oops in the igb driver on startup, not sure why.</s> | ||
* I have to unplug my keyboard and plug it back in on each boot =/ (this was also happening before). No, this is not fixed by changing the state of XHCI Handoff in my firmware. | * <s>I have to unplug my keyboard and plug it back in on each boot =/ (this was also happening before). No, this is not fixed by changing the state of XHCI Handoff in my firmware.</s> <tt>powertop</tt> was being invoked on each boot, turning on autosuspend. | ||
* I'm not sure this 4x140mm structure of fans in the roof is really doing me any good, and need to test with and without them. What really happened here is I saw [[Noctua]] had a chromax.black 140mm and creamed my jeans and was like "gotta order that!" Then I realized I had no 140mm mounts, and rather than do something sensible, I built up an autistic rage and was like OH FUCK YOU GOD, YOU TRY TO FUCK ME, NAH, I'LL JUST BUY THREE MORE FANS AND THREE-DEE PRINT MYSELF A BARUD-DÛR AND IT'LL INTERLOCK BECAUSE I TOO AM A MASTER OF REALITY, YOU OLD SHITTER, THEN I'LL GO BACK IN TIME AND KILL MY PARENTS BEFORE I CAN BE BORN AND UNDO ALL YOUR WORKS BITCH and then it was like, well, better use these fans I guess. | * <s>I'm not sure this 4x140mm structure of fans in the roof is really doing me any good, and need to test with and without them. What really happened here is I saw [[Noctua]] had a chromax.black 140mm and creamed my jeans and was like "gotta order that!" Then I realized I had no 140mm mounts, and rather than do something sensible, I built up an autistic rage and was like OH FUCK YOU GOD, YOU TRY TO FUCK ME, NAH, I'LL JUST BUY THREE MORE FANS AND THREE-DEE PRINT MYSELF A BARUD-DÛR AND IT'LL INTERLOCK BECAUSE I TOO AM A MASTER OF REALITY, YOU OLD SHITTER, THEN I'LL GO BACK IN TIME AND KILL MY PARENTS BEFORE I CAN BE BORN AND UNDO ALL YOUR WORKS BITCH and then it was like, well, better use these fans I guess.</s> they were indeed doing me no good, and have been replaced with a [[inaMORAta|MoRa-3]]. | ||
* Meanwhile, I don't think there's enough inflow. Need to test with the door open. | * <s>Meanwhile, I don't think there's enough inflow. Need to test with the door open.</s> remedied. | ||
* Apparently Type-C USB Power Delivery runs at 20 and 48 volts. No idea if I'm supplying this correctly, or if it's even in play. | * Apparently Type-C USB Power Delivery runs at 20 and 48 volts. No idea if I'm supplying this correctly, or if it's even in play. | ||
==Results (pictures!)== | ==Results (pictures!)== | ||
The machine is essentially silent outside of intense computational tasks and heavy disk I/O (the Exos drives are pretty solid across the board, except they're sometimes <i>loud</i>). It is rock stable despite the mastodontic 3970X being overclocked slightly above 4.3GHz, and can spend arbitrarily much time in the Turbo state (I am not currently making use of [https://en.wikichip.org/wiki/amd/pbo AMD PBO]). The processor temperature never exceeds | The machine is essentially silent outside of intense computational tasks and heavy disk I/O (the Exos drives are pretty solid across the board, except they're sometimes <i>loud</i>). It is rock stable despite the mastodontic 3970X being overclocked slightly above 4.3GHz, and can spend arbitrarily much time in the Turbo state (I am not currently making use of [https://en.wikichip.org/wiki/amd/pbo AMD PBO]). The processor temperature never exceeds 60℃; the GPU processor stays comfortably under 40℃. Coolant temperature stays thus far within ~8℃ of ambient. | ||
I can pull about 2Gbps off my RAID60 on a good day, an insane amount of spinning disk bandwidth, especially for archival media. My primary RAID1 is fast enough that I've never noticed blocking on it. | I can pull about 2Gbps off my RAID60 on a good day, an insane amount of spinning disk bandwidth, especially for archival media. My primary RAID1 is fast enough that I've never noticed blocking on it. | ||
| Line 471: | Line 589: | ||
[[File:Ohyeah.jpg|center]] | [[File:Ohyeah.jpg|center]] | ||
That'll do, | That'll do, pig. That'll do. | ||
==Future directions== | ==Future directions== | ||
| Line 483: | Line 601: | ||
<li><b>LoRa.</b> [[LoRa]] is a long-range, low-bandwidth radio protocol. I could bring an antenna out, and use the Arduino together with a LoRa chip.</li> | <li><b>LoRa.</b> [[LoRa]] is a long-range, low-bandwidth radio protocol. I could bring an antenna out, and use the Arduino together with a LoRa chip.</li> | ||
<li><b>Battery for the CCFL.</b> It would be nice to have some light when I'm working inside the machine. If I could provide selectable battery-based backup for these rods, that would be useful.</li> | <li><b>Battery for the CCFL.</b> It would be nice to have some light when I'm working inside the machine. If I could provide selectable battery-based backup for these rods, that would be useful.</li> | ||
<li><b>PID control for fans/pumps.</b> The Proportional-Integral-Derivative controller is a simple feedback mechanism that I suspect would work well with fans and pumps. I don't care how many RPM my fans are spinning at; what I care about is how warm my coolant and components are (and noise). I'd like to set up target ΔTs (as a function of ambient temp) and a target noise ceiling, and use an inline sensor, an ambient sensor, and an acoustic sensor in combination to manage my loop's active components.</li> | <li><b>PID control for fans/pumps.</b> The Proportional-Integral-Derivative controller is a simple feedback mechanism that I suspect would work well with fans and pumps. I don't care how many RPM my fans are spinning at; what I care about is how warm my coolant and components are (and noise). I'd like to set up target ΔTs (as a function of ambient temp) and a target noise ceiling, and use an inline sensor, an ambient sensor, and an acoustic sensor in combination to manage my loop's active components. <b>update: see my [[Counterforce]] project, which does all this and much more!</b></li> | ||
</ul> | </ul> | ||
| Line 492: | Line 610: | ||
* [https://www.overclockers.com/water-cooling-flow-rate-and-heat-transfer/ Water Cooling Flow Rate and Heat Transfer] on overclockers.com | * [https://www.overclockers.com/water-cooling-flow-rate-and-heat-transfer/ Water Cooling Flow Rate and Heat Transfer] on overclockers.com | ||
* Intel's [https://www.intel.com/content/dam/www/public/us/en/documents/guides/power-supply-design-guide-june.pdf ATX Power Supply] Design Guide | * Intel's [https://www.intel.com/content/dam/www/public/us/en/documents/guides/power-supply-design-guide-june.pdf ATX Power Supply] Design Guide | ||
[[CATEGORY: Hardware]] | |||
Latest revision as of 00:00, 24 November 2022

32 overclocked cores. 252TB spinning disk. 6TB NVMe. 256GB DDR4. And a Geiger counter.
My 2020 rebuild, Schwarzgerät II, was a beast of a machine. Like the Hubble or LHC, however, I had to give it more powah. The 2022 upgrade, Schwarzgerät III, does just that despite scrotumtightening supply chain madness. This rebuild focused on cooling, power, and aesthetics. I require that the machine be no louder than ambient noise (I live in the middle of Midtown Atlanta) when weakly loaded—I ought not hear the machine unless seriously engaged in active computation. At the same time, I want to overclock my 3970X as far as she can (reasonably) go.
(further upgraded 2022-04, hopefully the last bit for a minute)
“But out here, down here among the people, the truer currencies come into being.”―Gravity's Rainbow (1973)

I hesitated to call this the third iteration of Schwarzgerät, as there was no real compute upgrade (I did go from 128GB of DDR4-2400 to 256GB of DDR4-3000, but that hardly counts). The CPU, motherboard, and GPU are unchanged from 2020's upgrade. Nonetheless, the complete rebuild of the cooling system (and attendant costs, both in parts and labor) and radically changed appearance seemed to justify it.
This is my first machine with internal lighting, and also my first to use custom-designed parts (both mechanical and electric). I learned OpenSCAD and improved my 3d printing techniques during this build, and also extended my knowledge of electronics, cooling, and fluids. I furthermore developed a better understanding of power distribution. In that regard―and also with regards to the final product―I consider the build a complete success.
I bought the Corsair iCUE Commander Core Pro after having been informed that it had a Linux driver. Unfortunately, this driver only provides control of the fans. I extended it, along with OpenRGB, to fully support the device. Once perfected, these patches will of course make their ways upstream. I must say that it's incredibly satisfying to use a computer for which you wrote code and designed parts. In the future, I'd like to try fabricating my own chassis, and perhaps even my own PSU.
I also enjoyed my first leak, or more properly my first four leaks. All were due to my own stupidity, and all were corrected without the need for any RMAs. The first three were gross connection failures, resulting in incredible deluges covering most of my office floor. The last was a slow, insidious leak on top of my GPU waterblock. None of that was very much fun, but they were all discovered during a leak test. I did cover most of my GPU with coolant, but a hair dryer made quick work of that.
Bill of materials
We're approaching the $10,000 mark before correcting for inflation, with hard drives alone representing close to $5,000. Materials in this build were acquired over a period going back to 2011 (one of the LSI Fusion SAS cards is, I'm pretty certain, the component longest in my possession). This most recent iteration represents less than $2,000 of components, most of that being $1,150 for the 256GB of RAM (I did manage to sell my old RAM for $200, but we can't deduct that, unless we included its original cost).

Chassis


As always, I ride into battle atop my beloved CaseLabs Magnum T10, seeking death and glory. CaseLabs went ignominiously out of business in August 2018, and spare parts a la carte are now effectively unavailable. Nonetheless, it remains a truly legendary artifact, perhaps the single greatest case ever built (update 2022-03-03: nah, i just remembered the Cray XMP, and for that matter just about anything made by Silicon Graphics). This build makes more complete use of it than I ever have before.
- Caselabs Magnum T10 chassis with 85mm ventilated top plus...
- 3x Caselabs MAC-101 HDA+fan cages
- Caselabs MAC-113 120mm fan mount
- StarTech HSB4SATSASBA 4-bay 3U HDD cage. Removed factory fan, replaced with Noctua.
- Icy Dock MB324SP-B 4-bay 1U SSD cage
- Self-designed and -printed case for Arduino MEGA 2560 (source)
- Self-designed and -printed case for RHElectronics Geiger counter (source)
- Self-designed and -printed covering case for EKWB Quantum Kinetic FLT 240 mounting kit (source)
- Self-designed and -printed PCI brackets with cable channels (source)
- Self-designed and -printed 4x140mm fan mount for roof (source)
- DEMCiflex magnetic dust filter pack for CaseLabs Magnum TH10
- 2x USB 3.0 motherboard header 90 degree adapters
- USB 2.0 B-type 90 degree adapter
- EVGA PowerLink
- Many fittings...some EKWB-ACF, some EKWB Quantum Torque, some Bitspower
Cooling
A custom loop with redundant EK-D5 pumps (either can drive the entire loop, though of course with less flow). The loop "tours the world", running from the bottom of the left chamber straight out the back, coming halfway up, dashing inside for the waterblocks, up the rest of the way, across, across, rushing down to the bottom, coming across the bottom of the right chamber, and finally back to its origin, traversing four radiators along the way. I can partially drain and fill the loop without touching anything through the externally-mounted Kinetic FLT. Full draining and optimal filling proceed via the 5.25"-mounted Monsoon, sitting at the bottom of the case; this requires removing the USB bay installed above it.
There are fifteen 120mm fans, four 140mm fans, one 80mm fan (in the 4x3.5 bay), and one 40mm fan (in the 4x2.5 bay). There's also a 55mm chipset fan in the lower-right corner of the motherboard, and a 30mm fan under the IO shield (now uselessly) attempting to cool the VRMs. Most (eight) of the 120mm fans are mounted in push configuration to the four radiators, yielding a total of 1200mm² of radiator (720 on the top, and 480 on the bottom).
I have compiled tables of information regarding Noctua and EK-Vardar fans.
Bespoke loop

- EKWB Quantum Kinetic FLT 240 D5 pump + reservoir with mounting brackets. Installed halfway up the case's back, outside.
- EK Laing PWM D5 pump installed into the Quantum Kinetic.
- Bitspower BP-MBWP-CT G¼-10K temperature sensor. Installed in Quantum FLT's central front plug, running to motherboard's first external temp sensor.
- Monsoon MMRS Series II D5 pump housing + reservoir with 2x Silver Bullet biocide G¼ plugs. Installed at the front bottom of the case, in the lowest two 5.25" bays.
- EK Laing Vario D5 pump installed into the Monsoon.
- XS-PC G¼-10K temperature sensor. Installed in Monsoon's upper left plug, running to Corsair iCUE Commander Core XT's first external temp sensor.
- DiyHZ aluminum shell flowmeter and temperature sensor. LCD screen displays both values, and a 3-pin connector carries away flow information.
- EKWB Aorus Master TRX40 DRGB monoblock (nickel+plexi).
- EKWB EK-Quantum Vector RTX RE DRGB waterblock (nickel+plexi).
- Hardware Labs Black Ice Nemesis GTR360 16 FPI 54.7mm radiator, mounted to top PSU side (393x133mm).
- Hardware Labs Black Ice Nemesis GTS360 30 FPI 29.6mm radiator, mounted to top motherboard side (397x133mm).
- 2x Hardware Labs Black Ice Nemesis GTS240 XFLOW 16 FPI 29.6mm crossflow radiators, mounted to bottoms (292x133mm).
- Fancasee 1-to-4 PWM splitter, power from header
- Silverstone 8-way PWM splitter, SATA power
- 12.5mm ID EKWB ZMT, black
Most calculations will require knowing the total amount of coolant in our system. Fluid volumes of liquid cooling components are irritatingly difficult to establish (once the hardware is installed, anyway). With an inner diameter of 12.5mm, the ZMT has a cross-section of 122.72mm² (1.2272cm²). I got the EKWB fluid volumes directly from their support channel. G¼ has a diameter of 13.157mm, but that doesn't tell you anything about the inner diameter, which is not standardized =\. I used a graduated cylinder to measure the Monsoon and the radiators. Attachments can be considered 1--2mL each (a drain structure including a ball valve attachment, a T attachment, a 90° adapter and several extenders contained a total of 10mL).
| Component | Volume (mL) | Climb (m) | θ (rad) |
|---|---|---|---|
| HWL XFLOW 240 | 90 | 0 | 0 |
| Tubing | ? | 0 | 0 |
| HWL GTR360 | 320 | 0 | 0 |
| Tubing | ? | 0 | 0 |
| HWL GTS360 | 130 | 0 | 0 |
| Tubing | 44 | ||
| Aorus Master monoblock | 45 | π/2 | |
| Tubing | 11 | ||
| EK-Vector waterblock | 50 | π/2 | |
| Tubing | 22 | ||
| Quantum Kinetic FLT 240 | 265 | 0 | 0 |
| Tubing | 28 | ||
| DiyHZ flowmeter | 4 | π/4 | |
| HWL XFLOW 240 | 90 | 0 | 0 |
| Tubing | 11 | 0 | 0 |
| Monsoon Series Two D5 | 300 | 0 | 0 |
| Tubing | ? | 0 | 0 |
Note that water expands (becomes less dense) as it heats (down to 4℃, where it begins to do the opposite), meaning more pressure on its container. The coefficient of volume expansion β(1/℃) for water is 0.00021 at 20℃. This would suggest that a 96℃ rise would result in about a 2% expansion in the total volume, but this is incorrect, due to a changing β over temperature. By the time you get to 60℃ (most tubing isn't rated beyond this temperature), you've got a β closer to 0.0005. Here's the data for pure water at one atmosphere:
| ℃ | Density kg/m³ | Specific weight kN/m³ | Co. of thermal expansion β 10⁻⁶/K |
|---|---|---|---|
| 20 | 998 | 62.3 | 2.07 |
| 25 | 997 | 62.2 | 2.57 |
| 30 | 995 | 62.1 | 3.03 |
| 35 | 994 | 62.0 | 3.45 |
| 40 | 992 | 61.9 | 3.84 |
| 45 | 990 | 61.8 | 4.20 |
| 50 | 988 | 61.6 | 4.54 |
| 55 | 985 | 61.5 | 4.86 |
| 60 | 983 | 61.3 | 5.16 |
Integrating over this, water at 95℃ occupies about 4% more volume, with a density of ~961. From 20 to 60, volume increases by only about 1.5%, and from 20 to 40 that's only 0.6%. So we'll leave a small amount of room in our reservoirs; if we've got 1L total of coolant, we'll want to leave about 10mL total for thermal expansion. This represents e.g. about 4% of the Quantum Kinetic FLT 240.
Blowing out

- 4x Noctua NF-A14 chromax.black 140mm in roof
- 2x Noctua chromax.black NF-F12 PWM on GTS360
- Noctua NF-F12 iPPC-2000 PWM fan on GTS360
- 2x Noctua chromax.black NF-A12x25 PWM on mobo-side 240 XFLOW
- 2x Noctua NF-P12 redux-1700 PWM on PSU-side 240 XFLOW
- 2x EK Vardar PWM on GTR360
- Noctua NF-P12 PWM on GTR360
| Fan | Location | Watts | db(A) | CFM | Pressure |
|---|---|---|---|---|---|
| NF-F12 (2) | GTS360 | 0.6 (1.2) | 22.4 (25.4) | 93.4 (186.8) | 2.61 (5.22) |
| NF-F12 iPPC-2000 | GTS360 | 1.2 | 29.7 | 121.8 | 3.94 |
| NF-A12x25 (2) | GTS240 | 1.68 (3.36) | 22.6 (25.6) | 102.1 (204.2) | 2.34 (4.68) |
| NF-P12 redux-1700 (2) | GTS240 | 1.08 (2.16) | 25.1 (28.1) | 120.2 (240.4) | 2.83 (5.66) |
| EK Vardar (2) | GTR360 | 2.16 (4.32) | 33.5 (36.5) | 77 (154) | 3.16 (6.32) |
| NF-P12 | GTR360 | 0.6 | 19.8 | 120.2 | 2.83 |
Blowing in
- Noctua NF-A8 chromax.black 80mm, replacing original StarTech drive bay chinesium
- Noctua NF-F12 iPPC-2000 PWM mounted in front Flex-Bay
- Noctua NF-F12 iPPC-3000 PWM mounted in bottom drive cage bay
- 2x Noctua NF-S12A PWM on lower two drive cages
- Noctua NF-S12A FLX on top drive cage
All values are maxima:
| Fan | Location | Watts | db(A) | CFM | Pressure |
|---|---|---|---|---|---|
| NF-S12A (3) | Drive cages | 1.44 (4.32) | 17.8 (22.6) | 107.5 (322.5) | 1.19 (3.57) |
| NF-F12 iPPC-2000 | Flex-Bay | 1.2 | 29.7 | 121.8 | 3.94 |
| NF-F12 iPPC-3000 | Bottom cage | 3.6 | 43.5 | 186.7 | 7.63 |
| NF-A8 | 3.5" bay | 0.96 | 17.7 | 55.5 | 2.37 |
Compute

What can I say about the 3970X that hasn't been said? One of the premier packages of our era, and probably the best high-end processor-price combo since Intel's Sandy Bridge i7 2600K. It's damn good to have you back, AMD; my first decent machine, built back in 2001, was based around a much-cherished Athlon T-Bird.
- AMD Ryzen Threadripper 3970X dotriaconta-core (32 physical, 64 logical) Zen 2 7nm FinFET CPU. Base clock 3.7GHz, turbo 4.5GHz. Overclocked to 4.25GHz.
- Gigabyte Aorus Master TRX40 Revision 1.0. Removed factory cooling solution, replaced with EKWB monoblock.
- 8x Kingston Fury Renegade RGB DDR4-3000 32GB DIMMs for 256GB total RAM.
- EVGA GeForce RTX 2070 SUPER Black Gaming 6GB GDDR6 with NVIDIA TU104 GPU. Installed in topmost PCIe 4.0 16x slot, though this is only a 3.0 card.
- ELEGOO MEGA 2560 Revision 3, connected to NXZT internal USB hub, mounted to back of PSU chamber
As I detailed regarding Schwarzgerat II, the 3990X is an amazing achievement in chip design and fabrication, but I believe it to be severely starved for many tasks by its memory bandwidth; with its four memory channels populated, the ThreadRipper 3990X can hit about 90GB/s from fast DDR4; its EPYC brother can pull down ~190 through its eight channels. For my tasks, it's rare enough that I can drive all my 32 cores; with the 3990X, I'd be paying twice as much to hit full utilization less often, and be unable to bring full bandwidth to bear when I did.
I absolutely 🖤 my 3970X, though. Bitch screams. Anyone overclocking on Linux should be aware of turbostat. The 3970X supports 88 lanes of PCIe 4.0, of which the TRX40 chipset consumes 24, leaving 64 for expansion devices. I've got 16 (GPU) + 16 (Hyper X) + 2x8 (LSI cards) + 12 (M.2 onboards) for 60 total, coming in just under saturation.
Power
Power ended up being a tremendous pain in the ass.
- EVGA Supernova Titanium 850 T2
- Can provide 850W (~70A) of 12V power, but only 100W (20A) of 5V
- CableMod green/black braided cables for PSU
- BitFenix 3-way Molex expander
- 2x PerformancePCs PCIe-to-Molex converters
- BitFenix Molex-to-4xSATA converter
- 2x 4-way SATA expanders
- 2x Bankee 12V->5V/15A buck transformers
To make a lengthy story short (it's told in much more detail below), I needed more SATA power cables than my PSU supported. The buck transformers are used to convert the 12V on PCIe cables to 5V+12V as needed by SATA drives.
Storage

- 14x Seagate Exos X18 18TB 7200 rpm SATA III drives in striped raidz2
- Asus HyperX 4x M.2 PCIe 3.0 x16
- 2x LSI Fusion PCIe 2.0 x8 2x SAS
- 2x Samsung 970 EVO Plus 2TB NVMe M.2 in raidz1
- 2x Western Digital Black SN750 1TB NVMe M.2 in raidz1
- Intel Optane 16GB M.2
- 4x CableDeconn SAS-to-4xSATA cables for use with LSI Fusions
- 2x CableDeconn 4x SATA cables for use with motherboard
I love the CableDeconn bunched SATA data cables; they're definitely the only way to fly (assuming lack of SATA backplanes, which good luck in a workstation form factor). We end up with 4x 3.5 drives in the bay, 10x 3.5 drives in CaseLabs cages in the PSU side, 3x M.2 devices in the motherboard PCIe 4.0 slots, and 2x M.2 devices in the HyperX card. This leaves room for 2 more M.2s in the card, and 4x 2.5 devices in the smaller bay. The bottom 2 slots in the bottom hard drive cage are blocked by the PSU-side radiator; indeed, I had to take a hacksaw to said cage to get it into the machine.
How to arrange 14 disks so as to create a single volume? I don't bother with solutions involving hot spares:
| Name | Setup | Availability | MaxTol | MinFail | Max Rebuild |
|---|---|---|---|---|---|
| raid3z | 11 data, 3 parity | 78.6% (11) | 3 | 4 | 100% + fail |
| raid2z | 12 data, 2 parity | 85.7% (12) | 2 | 3 | 85.7% + fail |
| striped raid3z | 2x(4 data, 3 parity) | 57.1% (8) | 3 + 3 | 4 | 50% + fail |
| striped raid2z | 2x(5 data, 2 parity) | 71.4% (10) | 2 + 2 | 3 | 50% + fail |
| striped raidz | 2x(6 data, 1 parity) | 85.7% (12) | 1 + 1 | 2 | 50% + fail |
| mirrored raid3z | 2x(4 data, 3 parity) | 28.6% (4) | 7 + 3 | 8 | 50% + fail |
| mirrored raid2z | 2x(5 data, 2 parity) | 35.7% (5) | 7 + 2 | 6 | 50% + fail |
| mirrored raidz | 2x(6 data, 1 parity) | 42.9% (6) | 7 + 1 | 4 | 50% + fail |
| raidz3 of stripes | 7x(2) 4 data, 3 parity | 57.1% (8) | 2 + 2 + 2 | 4 | 100% + fail |
| raidz2 of stripes | 7x(2) 5 data, 2 parity | 71.4% (10) | 2 + 2 | 3 | 85.7% + fail |
I went with a striped raidz2 for my 14 Exos drives (also known as a RAID60 in the Old English), yielding 180TB usable from 252TB total (71.4%). I suffer data loss if I lose any combination of 5 drives, and can lose data if I lose certain combinations of 3 drives (any combination where all three lost drives are in the same raid2z), but no rebuild ever involves more than seven drives. All filesystems are ZFS, and all storage enjoys some redundancy (save the 16GB Optane, which is just for persistent memory/DAX experiments). I could have split the volume and had two raidz2s with no interdependence, but eh.
Interfaces

- NXZT internal USB 2.0 hub, magnetically attached to underside of PSU, connected to motherboard USB 2.0 header
- RHElectronics Geiger counter, wired via 3 pins to 2560 MEGA, mounted to back of PSU chamber
- Corsair ICUE Commander Core XT RGB/fan controller, mounted in top, connected to NXZT internal USB hub
- Monsoon CCFL 12V inverter, mounted to top, powered via SATA power connector attached to 12V Molex attached to video power line
- GY-521 board for MPU 6050 accelerometer + gyro, wired via 8 pins to 2560 MEGA, mounted to back of PSU chamber
- DIY-FAB USB 3.2 front plate, connected to motherboard USB 3.2 header
- 2x USB 3.0 front plates, connected to motherboard USB 3.0 headers
Lighting
- 4x Corsair 410mm ARGB LED lines, connected in series to Corsair Commander Core, attached via adhesive around bottom cooling complex of the motherboard side.
- 2x 12V RGB LED lines, backlighting top radiators, attached to motherboard's top RGB header via 1-to-2 RGB splitter.
- 5x green PerformancePCs CCFL rods, attached to Monsoon DC->AC inverter, mounted to back inner corner of each chamber.
- ARGB lines on EVGA Quantum FLT and Aorus Master monoblock, attached to motherboard's top and bottom ARGB headers respectively.
- RGB tops on Rage DIMMs are unmanaged, and self-synchronize via infrared.
- Piratedog Corsair to ARGB adapter
- Piratedog Corsair RGB 1-to-2 splitter
- EZDIY-Fab ARGB LED strips
I currently have no window on my PSU side, so there's no point putting lighting in there. I do have a short strip of 12V LEDs just in case I need to work in there without light (though presumably with the machine on). I'd like to get these on a switch or something. Ideally both these and the CCFLs would be on a switch with a battery backup. I'm sad that I bought into the Corsair ecosystem. It's almost entirely closed and proprietary, even the connectors. Props to PirateDog Tech for working around this.
Distributing power

I began to run into some serious power issues on this build, originating in the Exos X18 drives (of which, you might remember, there are 14). It will be worth your time to consult the Exos 18 manual. Remember, 12V is for the motor, and 5V is for the logic.
The Supernova T2 is an 80+ Titanium unit, and thus ought operate at efficiencies of at least:
| Load | Efficiency | Maximum draw | Waste |
|---|---|---|---|
| 10% (85W) | 90% | 94.4W | 9.4W |
| 20% (170W) | 92% | 184.8W | 14.8W |
| 50% (425W) | 94% | 452.1W | 27.1W |
| 100% (850W) | 90% | 944.4W | 94.4W |
At full load, we're burning almost a hundred watts of dinosaurs at the PSU, which will generate some fairly serious heat. In practice, I'm usually below 400W, and rarely exceed 600W, putting me at the ~50% sweet spot. I can query my UPS for power usage (though this includes my monitor and other externals):
[schwarzgerat](0) $ sudo pwrstat -status
Model Name................... CP1500PFCLCD
Rating Voltage............... 120 V
Rating Power................. 900 Watt
State........................ Normal
Power Supply by.............. Utility Power
Utility Voltage.............. 116 V
Output Voltage............... 116 V
Battery Capacity............. 100 %
Remaining Runtime............ 17 min.
Load......................... 333 Watt(37 %)
Line Interaction............. None
Last Power Event............. Blackout at 2020/03/08 19:16:10 for 24 sec.
[schwarzgerat](0) $
Looking at this, I realize that I have only a 900W-capable UPS, and the machine can theoretically draw 944.4W all by itself. I should probably do something about that.
Power draws
Power is natively required in the following form factors:
- Molex (12V only): 2 (pumps)
- Molex (5V only): 2 (flowmeter, USB hub)
- SATA (12V+5V): 13 (10 disks, 2 for StarTech bay, 1 for IcyDock bay)
- SATA (12V only): 2 (inverter, fan controller)
- SATA (5V only): 3 (USB front bays, Corsair)
- PCIe: 1 (GPU)
- 3-pin ARGB: 4 (ARGB headers, 5A each)
- 4-pin DRGB: 2 (DRGB headers, 2A each)
- 4-pin fan: 15
I got these numbers from product documentation or, in the case of the EKWB LEDs, from the manufacturer's support channel. Corsair LED strip information came from PirateDog Tech. The Corsair iCUE Commander XT is rated for a maximum of 4.5A total.
| Item | 5V watts | 12V watts | Source |
|---|---|---|---|
| EKWB PWM D5 (in Quantum FLT) | 0 | 23 | Molex |
| EKWB Vario D5 (in Monsoon) | 0 | 23 | Molex |
| EVGA RTX Super 2070 (stock clocks) | 0 | 215 | Mobo + PSU |
| AMD 3970X (stock clocks) | 0 | 280 | 2x EPS12V |
| Aorus Master TRX40 | 0 | ? | ATX12V |
| Silverstone fan controller | 0 | ? | SATA |
| Noctua NF-A14 (x4) | 0 | 1.56 (6.24) | Corsair (SATA) |
| Noctua NF-P12 redux-1700 (x2) | 0 | 1.08 (2.16) | Fan header |
| Noctua NF-F12 iPPC-2000 | 0 | 1.2 | Fan header |
| Noctua NF-F12 iPPC-3000 | 0 | 3.6 | Fan header |
| Noctua NF-S12A FLX | 0 | 1.44 | Fan header |
| Noctua NF-S12A PWM (x2) | 0 | 1.44 (2.88) | Fan header |
| Noctua NF-A12x25 (x2) | 0 | 1.68 (3.36) | Fan header |
| Noctua NF-F12 iPPC-2000 | 0 | 1.2 | Silverstone (SATA) |
| Noctua NF-P12 PWM | 0 | 0.6 | Silverstone (SATA) |
| Noctua NF-F12 chromax.black (x2) | 0 | 0.6 (1.2) | Silverstone (SATA) |
| EK-Vardar X3M 120ER Black (x2) | 0 | 2.16 (4.32) | Silverstone (SATA) |
| S5050 LEDs | 0 | 12W/meter (60 LEDs) | RGB header |
| Monsoon inverter | 0 | ? | SATA |
| Monsoon LEDs | 0 | ? | Molex |
| Exos18 (x14) (spinning) | 4.6 (64.4) | 7.68 (107.52) | SATA |
| Exos18 (x14) (spinup) | 5.05 (70.7) | 24.24 (339.36) | SATA |
| EKWB Quantum Kinetic FLT 240 LEDs | 3.9 | 0 | ARGB header |
| EKWB Aorus TRX40 Monoblock LEDs | 1.05 | 0 | ARGB header |
| DiyHZ light strips | ? | 0 | ARGB header |
| Corsair Commander Pro XT (logic) | ? | 0 | SATA |
| Corsair LED strips (x4) | 1.835 (7.34) | 0 | Corsair (SATA) |
| DiyHZ flowmeter | ? | 0 | Molex |
| NXZT USB2 hub | ? | 0 | Molex |
| Arduino 2560 | 2.5 (5V * 500mA USB max) | 0 | NXZT (Molex) |
| Western Digital (2x) | 0 | 0 | 2.8A @ 3.3V (9.24W) |
| Samsung 970 EVO (2x) | 0 | 0 | 1.8A @ 3.3V (6W) |
| AMD TRX40 chipset | 0 | 0 | 14.3A @ 1.05V (15W) |
The Silverstone supports draws up to 4.5A (54W). The Corsair supports a 12V fan draw of 4.5A (54W) and a 5V RGB draw of 4.5A (22.5W).
The PSU claims support of up to 100W as 5V (20A), and up to 850W as 12V (71A). The 5V line is dominated by hard drives, which will consume 65W when in active use (and 70W when spinning up). Beyond them, there are very few 5V draws; the ARGB light strips are going through the motherboard's ARGB headers, the internal USB hub and downstream devices are getting 5V from Molex, and the Corsair is pulling over SATA. Even if the motherboard ARGB headers are fed by the ATX12V's 5V lines, we're talking 20W max, and probably less than that.
We're all clear on 12V until overclocking comes into play. The GPU and CPU will never be maxed out while the drives are spinning up (provided that we don't spin down the motors after startup), so the drives will be consuming 107W instead of 339W. The stock CPU+GPU are 495W, 46W for pumps, and some unknown but substantial amount is consumed by the motherboard; let's estimate a very generous 100W. That's 748W total. With 750W left after 100W are devoted to 5W, we're cutting it close, but that ought be a rare load. In practice, the machine tends to take about 300W in everyday use, up to about 600W under computational load; to really push the envelope, I'd need force heavy computational and I/O load. I'll see what happens next time I build a kernel while my ZFS is rebuilding.
The drive problem
QUOTH the Exos 18 datasheet:
| Mode | 5V Amps | 12V Amps |
|---|---|---|
| Standby | 0.23 | 0.01 |
| Idle_A | 0.30 | 0.31 |
| Idle_B | 0.25 | 0.19 |
| Idle_C | 0.24 | 0.13 |
| Sequential Write (64K/18Q) | 0.92 | 0.31 |
| Random Read (64K/18Q) | 0.36 | 0.64 |
| Spinup | 1.01 | 2.02 |
I chose Sequential Write and Random Read because those are the most intensive operations (barring Spinup) for the 5V and 12V loads, respectively. For the regular use cases, we have no problems: the maximum 5V usage ought be around 64.4W (14 * 0.92A * 5V), and the maximum 12V usage ought be around 107.52W (14 * 0.64A * 12V).


What about spinup, though? We're talking 70.7W of 5V and 339.36W of 12V! That's 24.24W of 12V per disk. A Molex connector (using 14 AWG wire, at reasonable temperatures, on .093" pins—note that ATX12V only mandates 18 AWG) can carry 132W of 12V power and 55W of 5V power (11 amps per pin, 1 pin per voltage level). A SATA power connector can carry 54W of 12V power and 22.5W of 5V power (1.5 amps per pin, 3 pins per voltage level). A SATA power connector can thus safely supply spinup current to only two of these Exos drives! With three SATA power connectors from my PSU, that only covers 6 drives, leaving 8 unaccounted for. With that said, the three connectors together ought be fine for normal use, following spinup.
If I also employed my one Molex, I could handle another two drives, but I need my Molex for a variety of other things. We must then handle this spinup case via another mechanism.
Let's first knock out anything that doesn't need 5V. Our motherboard, CPU, and GPU all take their own cables. The PCIe power cables can carry 75W (6-pin) or 150W (8-pin), almost all of it 12V. Four items in our build require only 12V: the two pumps, the Silverstone fan splitter, and the Monsoon CCFL inverter. Two of these four are in the back, and two in the front. We go ahead and use two of the PCIe cables, together with PCIe-to-Molex PerformancePC adapters and BitFenix Molex splitters, to drive these four items. This takes care of all our fans (save the two on the back of the bays) -- those which weren't on the Silverstone are drawing power from the motherboard.
We have six remaining items requiring 5V power: the flowmeter, the Corsair, the internal USB hub, and the three front panel USB bays. Of these, three natively want Molex 4-pin, and the other 3 want SATA. Combined with our 14 drives, that's 20 power drains.
I initially solved this problem using PUIS (Power-Up In Standby), a feature of the SATA specification. Enabling this feature on a disk will prevent it from spinning up until it receives a particular command, which can be issued by the OS (so long as you don't need your system firmware to recognize the disk, which will be unreadable until this command is sent). This had the downside of requiring me to keep my disks spinning once the machine had started, since I'd otherwise run into the problem anew should they all spin back up at the same time.
I at first intended to solve this with 12V relays (or better yet, an 8-MOSFET) controlled by the Arduino, but instead used two 12V->5V buck transformers, splice the 12V line of my remaining PCIe cables (see below), and made myself underpowered 4-pin Molex cables from them. Each PCIe cable and its 66W of 12V is good for three drives when taken through three Molex-to-SATA adapters.
Power sources
Here's what's available from the EVGA Supernova T2 850:
| Cable | 3V watts | 5V watts | 12V watts | Notes |
|---|---|---|---|---|
| SATA x3 | 14.85 | 22.5 | 54 | Can bridge to (underpowered) Molex. Don't rely on the 3.3V line; it's sometimes missing from various components. Which also means we needn't provide it, should we synthesize SATA (though we'll be unable to use PWDIS). For various reasons, actual supply of 3V is pretty spotty among SATA power cables. |
| Perif (Molex) | 0 | 55 | 132 | Can bridge to SATA or PCIe. Wiring might not be safe for the full pin capacity. |
| PCIe x4 | 0 | 0 | 75 | Can bridge to (underpowered) 12V-only (2-pin) Molex. Can probably bridge (with buck transformer) to underpowered Molex. |
As noted above, the first thing we do is take our 12V-only devices, and stick them on 2-pin Molex extended from the PCIe cables. We use two different cables, both due to these devices' locations, and to avoid an unnecessary single point of failure for the redundant pumps. We use a 2-way molex splitter and a molex-to-SATA on each along the way. This takes care of our pumps, the inverter, and the fan controller.
There are 4 of the PCIe cables, 1 peripheral cable, and 3 SATA cables. Of these last, two have 3 ports, and one has 4 ports. That's 10 native SATA ports. Conveniently, we have 10 drives in our cages, so we'll go ahead and just use all three cables there.
With all our SATA cables allocated, our only remaining source of 5V is the peripheral Molex cable. We still have 8 junctions that require 5V, so there's some real pressure on our physical 5V distribution. We'll use our 4-port peripheral cable, adding a 1-to-4 Molex expander on the end. That still leaves one sink unallocated; we'll have to use a 1-to-2 SATA splitter on one of the 3-port SATA cables.
Obviously, we'll want to serve a native SATA device with this split, but do we want to use a heavy SATA draw or a light one? Well, our Molex line is already responsible for 4 filled SATA drives through the StarTech bay...but then again, our Molex line can supply more than twice the 5V amperage of a SATA line. The SATA line is servicing three devices; at spinup, that's 15.15W (67% of 22.5). The Molex line is servicing four devices, for 20.2W (36.7% of 55). More importantly, the SATA line has headroom of 7.35W, while the Molex line has headroom of 34.8W. Even when those USB bays come on, even if they're doing the 1.5A of USB3's dedicated charging, they're still putting out 7.5W max (per device). It ends up making way more sense to keep the heavyweight Corsair on our Molex line, and instead kick as light a draw as we can to the SATA line.
This calculation might change if we ever populated the IcyDock 2.5" bays, but they're currently empty.
Selected externals
- Dell U3417W FR3PK 34" ultrawide LED—more than one monitor is dumb
- Unicomp Endurapro 105 USB keyboard—keyboards need (a) trackpoints and (b) to double as melee weapons
- Black IBM Model M-13 Trackpoint II for special occasions
- If you have any of these, I will pay you serious fucking cash for them
- Black IBM Model M-13 Trackpoint II for special occasions
- Logitech MX Master 3 mouse
- Topping DX7s USB DAC
- BladeRF 2.0 SDR
- MoRFeus wideband signal generator
- 4xRTL2832 Kerberos SDR radar
- Cyber Power Systems CP1500 AVR UPS
- ConBee II Zigbee USB adapter
- Nooelec Ubertooth One
Regrets and stupidities

- I ought have wrapped all the tubing in anti-kink coils (which I already had!) way earlier.
- I ought have bought a second LSI SAS card from the outset, rather than going through two POS chinesium 1x cards, both of which continuously reset attached disks (I'm guessing due to my fairly lengthy cables? who knows).
- I ought have paid more attention to which fans I was putting on which radiators.
- The 1000W edition of my 850W power supply would have simplified some things. Oh well, it was a carryover from previous builds.
- Shouldn't have ordered that stupid incompatible GPU backplate =/.
- Definitely shouldn't have installed that stupid incompatible GPU backplate =/.
- Shouldn't have used the top- and bottom-side of the same port for initial GPU connections; lesson learned.
- Should have ordered more goddamn fittings at once.
- Should have done my research on LEDs, how annoying it is to splice together LEDs so that all colors continue to work, how best to lay them out etc. 12V LEDs are pretty lame overall; I doubt I'll use them again.
- At some point I powered on my machine, heard a loud pop, and watched smoke begin to drift out. The room smelled definitively of blown capacitor...but I could not find one on my motherboard, nor can I find any hardware which has ceased working. What the hell exploded?

- I really wish the top disk cage was on the bottom, but it seemed impossible due to radiator placement. Maybe I could have come up with something? Then again, its current placement only blocks access to some fan connectors, whereas placement on the bottom blocks access to a bunch of things.
- The connection between the Monsoon and the right-side XFLOW sucks. It could surely be improved (how?).
- The connection between the GTR360 and the right-side XFLOW sucks. A different radiator could have probably avoided this monstrosity.
- Fuck Corsair's proprietary-everything. I bought this stupid Commander Pro because I wanted to support Linux-compatible hardware, but it's practically useless without a bunch of other Corsair crap.
- Should have ordered at least three PCIe-to-Molex adapters. Those things are the shit, but only PerformancePCs seems to sell them, and getting another one would be yet another ass-rape of a shipping charge. PPCS, charge less for shipping!
- "can't you just make them yourself, you dumb asshole?" probably yes, but theirs are braided and lovely
- The whole CCFL business was a misadventure, and I regretted it almost immediately. Had to ship a DoA inverter back to PPCS. Cracked a tube unpacking the box.
My biggest fuckup
In perhaps the biggest error, upon reflection it's clear that I ought have inverted the XFLOW-240 on the bottom of the PSU chamber. The output node is already along the path of the tubing, so I'd save several centimeters there. Having the output node away from the center would make running wires much easier. The tubing in the back would similarly lose several inches, and both tubes would lose a change in direction. The tube in the back would no longer mess with the USB devices in the PSU chamber, and would look a lot cleaner. It was originally restricted to the current orientation because I thought I'd be putting a disk cage in the bottom, rather than in the top.
When I change this, I'm also going to put the lower radiators into a push+pull configuration (there's not room to do so with the top radiators). This probably means I'll need to raise the reservoir+pump in the front bays. Doing so will cut some length from the back tube going to the EKWB reservoir (good), and will make the direction change tighter (bad). If this direction change can't be made, even with reinforcing anti-kink coils, I can either:
- Split the tube into two tubes and use a 90-degree adapter (plus two compression fittings and a male-to-female adapter).
- Use a bent bit of hard tubing for this connection. Would need to learn how to do hard tubing.
- Replace the 45-degree adapter connecting the flowmeter to the radiator with a 90-degree adapter. This will lower the flowmeter, putting its output near its original location, eliminating any tubing length gains.
The reservoir will be raised no more than the height of the fan being added to the radiator; it will likely move from the bottom bay to the bay immediately above that. Essentially, we're raising the entire floor of our cooling system by one fan's height. I'll be using Phanteks T30-120s, so that's 30mm. We could theoretically move everything higher with a shroud around these fans, but it would make working on the machine a goddamn nightmare.
When I do this, I'll likely raise the Vario pump's setting from 2 to 3. I might even replace the Vario pump with a proper PWM one. It would also be a fine time to fix my other D5 so it reports tach properly.
Ongoing issues
My flow rate is lower than I would like, assuming this flowmeter to be reliable. Maxing out the PWM pump hits desirable flow rates, but with more noise than I want. I think there might be some flow reduction in the tubing between the flowmeter and Quantum Kinetic; I'm considering replacing that with hardline. For all I know, there's still a big air pocket in some radiator.there was indeed a big air pocketMy onboard Ethernet stopped working, and I'm still not sure why.the ethernet cable wasn't plugged into the outlet all the way, lol, you dumb idiotI'm getting a kernel oops in the igb driver on startup, not sure why.I have to unplug my keyboard and plug it back in on each boot =/ (this was also happening before). No, this is not fixed by changing the state of XHCI Handoff in my firmware.powertop was being invoked on each boot, turning on autosuspend.I'm not sure this 4x140mm structure of fans in the roof is really doing me any good, and need to test with and without them. What really happened here is I saw Noctua had a chromax.black 140mm and creamed my jeans and was like "gotta order that!" Then I realized I had no 140mm mounts, and rather than do something sensible, I built up an autistic rage and was like OH FUCK YOU GOD, YOU TRY TO FUCK ME, NAH, I'LL JUST BUY THREE MORE FANS AND THREE-DEE PRINT MYSELF A BARUD-DÛR AND IT'LL INTERLOCK BECAUSE I TOO AM A MASTER OF REALITY, YOU OLD SHITTER, THEN I'LL GO BACK IN TIME AND KILL MY PARENTS BEFORE I CAN BE BORN AND UNDO ALL YOUR WORKS BITCH and then it was like, well, better use these fans I guess.they were indeed doing me no good, and have been replaced with a MoRa-3.Meanwhile, I don't think there's enough inflow. Need to test with the door open.remedied.- Apparently Type-C USB Power Delivery runs at 20 and 48 volts. No idea if I'm supplying this correctly, or if it's even in play.
Results (pictures!)
The machine is essentially silent outside of intense computational tasks and heavy disk I/O (the Exos drives are pretty solid across the board, except they're sometimes loud). It is rock stable despite the mastodontic 3970X being overclocked slightly above 4.3GHz, and can spend arbitrarily much time in the Turbo state (I am not currently making use of AMD PBO). The processor temperature never exceeds 60℃; the GPU processor stays comfortably under 40℃. Coolant temperature stays thus far within ~8℃ of ambient.
I can pull about 2Gbps off my RAID60 on a good day, an insane amount of spinning disk bandwidth, especially for archival media. My primary RAID1 is fast enough that I've never noticed blocking on it.
-
 from the front
 -
 from above
 -
 mobo side, door closed
 -
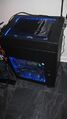 isometric perspective
 -
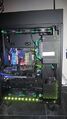 mobo side in light
 -
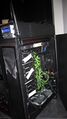 psu side


That'll do, pig. That'll do.
Future directions
I'm not sure where else I can go with this machine. There doesn't appear to be much useful work I can do beyond what I've aleady done. Some thoughts:
- Case modding. I could add a window to the PSU door, and improve on the piping in the back. I'm very hesitant to go cutting apart the irreplaceable CaseLabs Magnum T10, though; it's not like I can go buy another one.
- Grow down. If I could find (or more likely fabricate) a pedestal for the machine, I could go extensively HAM with radiators, or add a second motherboard for a virtual-but-not-really machine. I don't really need either, though, and the latter would require a second (or at least significantly larger) PSU.
- Mobility. Work towards the Rolling War Machine by augmenting the existing accelerometer with sensing and movement capabilities. Kind of a big (and expensive) box (and small condo) to be tearing around on its own initiative.
- Hard tubing. Regarded a superior look by many in the watercooling community, but I don't really think so—in a big case like this, I dig the more organic look of soft tubing. It's also infinitely less annoying to work with.
- Voice recognition. Since this workstation can control my ceiling fans (via SDR) and lights (via Hue), it would be nice to have some basic voice-based operation, but without sending anything outside the computer. This would mostly be a software project, except there exist cheap chips to do this easily. I could also tie this into my multifactor security story (i.e. don't unlock without my voice).
- LoRa. LoRa is a long-range, low-bandwidth radio protocol. I could bring an antenna out, and use the Arduino together with a LoRa chip.
- Battery for the CCFL. It would be nice to have some light when I'm working inside the machine. If I could provide selectable battery-based backup for these rods, that would be useful.
- PID control for fans/pumps. The Proportional-Integral-Derivative controller is a simple feedback mechanism that I suspect would work well with fans and pumps. I don't care how many RPM my fans are spinning at; what I care about is how warm my coolant and components are (and noise). I'd like to set up target ΔTs (as a function of ambient temp) and a target noise ceiling, and use an inline sensor, an ambient sensor, and an acoustic sensor in combination to manage my loop's active components. update: see my Counterforce project, which does all this and much more!
Links
- Joseph Gleason's Project Argus marks him an absolute madlad
- 45drives.com's invaluable spinup series
- The Effects of Flow Rate on Watercooling on tom's hardware
- Water Cooling Flow Rate and Heat Transfer on overclockers.com
- Intel's ATX Power Supply Design Guide