Schwarzgerät III upgrade: Difference between revisions
| (30 intermediate revisions by the same user not shown) | |||
| Line 3: | Line 3: | ||
==Summary of changes== | ==Summary of changes== | ||
[[File:Schwarz-loop.png|thumb|right|Custom loop]] | |||
* '''New hardware''': | * '''New hardware''': | ||
** Added RGB+fan hub | ** Added 12V RGB+fan hub to the top of the PSU side | ||
** Added [https://www.marvell.com/content/dam/marvell/en/public-collateral/ethernet-adaptersandcontrollers/marvell-ethernet-controllers-aqc107-108-product-brief.pdf Aquantia AQC107] 10Gbps NIC. | ** Added [https://www.marvell.com/content/dam/marvell/en/public-collateral/ethernet-adaptersandcontrollers/marvell-ethernet-controllers-aqc107-108-product-brief.pdf Aquantia AQC107] 10Gbps NIC. | ||
** Added [https://shop.aquacomputer.de/product_info.php?products_id=3953&language=en aquacomputer NEXT] sensor. | ** Added [https://shop.aquacomputer.de/product_info.php?products_id=3953&language=en aquacomputer NEXT] sensor. | ||
| Line 10: | Line 11: | ||
** Added another 4-drive bay to the mobo side, replacing a Caselabs hard drive cage from the PSU side. | ** Added another 4-drive bay to the mobo side, replacing a Caselabs hard drive cage from the PSU side. | ||
** Added PCIe 1x card exposing an internal 19-pin USB3 header and 2 external USB3 Type-A ports. | ** Added PCIe 1x card exposing an internal 19-pin USB3 header and 2 external USB3 Type-A ports. | ||
** Added Gelid | ** Added [https://gelidsolutions.com/thermal-solutions/codi6-argb-controller/ Gelid CODI6] PWM+ARGB hub. | ||
* '''Cooling''': Added six Phanteks T30 fans and moved some others around. Flipped bottom cooling complexes to blow inside the case (up) rather than outside (down), as there otherwise wasn't enough air flowing into the machine. Inverted PSU-side XFLOW, and shortened associated coolant tubes. Added | * '''Cooling''': | ||
** Added six Phanteks T30 fans and moved some others around. | |||
** Flipped bottom cooling complexes to blow inside the case (up) rather than outside (down), as there otherwise wasn't enough air flowing into the machine. | |||
** Inverted PSU-side XFLOW, and shortened associated coolant tubes. | |||
** Added drain port to bottom of PSU side, at the loop's true lowest point. | |||
** Added intake port high on mobo side. | |||
** Moved DiyHZ sensor above the video card. | |||
** Inserted NEXT where DiyHZ had been. | |||
** Added XTOP Dual D5 pumps behind where Monsoon had been. | |||
* '''Structure''': | * '''Structure''': | ||
** Designed and printed [[:File:Cablebracket.jpg|pci bracket with cable guide]]. | ** Designed and printed [[:File:Cablebracket.jpg|pci bracket with cable guide]]. | ||
** Designed and printed cable | ** Designed and printed [[:File:3dprinted-cablefront.jpg|cable shroud]] for mobo side. | ||
** Designed and printed [[:File:Xtopbrace.jpg|sliding brace]] for XTOP. | ** Designed and printed [[:File:Xtopbrace.jpg|sliding brace]] for XTOP. | ||
* '''Power''': Upgraded to a 1000W supply, eliminating the need for my jury-rigged 12V+5V Molexen. | * '''Power''': Upgraded to a 1000W supply, eliminating the need for my jury-rigged 12V+5V Molexen. | ||
* ''' | * '''Removed hardware''': | ||
* | ** Removed unused IcyDock 4x2.5" enclosure, freeing up 4x SATA data and 1x SATA power. | ||
** Removed second LSI SAS card, which was no longer needed. | |||
** Removed 4x140mm fans and associated brace from top. | |||
** Removed Monsoon reservoir+pump combo. | |||
** Moved Vario pump into Quantum Kinetic FLT, replacing dead PWM D5 pump. | |||
==New cooling configuration== | ==New cooling configuration== | ||
[[File:Schwarz-cool.png|thumb|Fan setup]] | |||
Coolant temperatures are sampled at both reservoirs. The Monsoon sensor feeds into the Corsair, while the Quantum sensors feeds into the motherboard. Ambient temperatures are sampled via two sensors immediately outside the rear of the motherboard side, towards the bottom. One feeds into the Corsair, and one feeds into the motherboard. Currently, all PWM is then controlled based off absolute coolant temperature, but ideally it would be controlled using the difference between coolant and ambient temperatures. | Coolant temperatures are sampled at both reservoirs. The Monsoon sensor feeds into the Corsair, while the Quantum sensors feeds into the motherboard. Ambient temperatures are sampled via two sensors immediately outside the rear of the motherboard side, towards the bottom. One feeds into the Corsair, and one feeds into the motherboard. Currently, all PWM is then controlled based off absolute coolant temperature, but ideally it would be controlled using the difference between coolant and ambient temperatures. | ||
| Line 31: | Line 45: | ||
* aquacomputer NEXT sensor | * aquacomputer NEXT sensor | ||
The Noctuas provide 102.1m³/h and 2.34mm H₂O each. The Phanteks provide | The Noctuas provide 102.1m³/h and 2.34mm H₂O each. The Phanteks provide 114m³/h and 3.3mm H₂O each. | ||
All fans are powered by a Corsair iCUE Commander Core XT capable of 4.5A. The Phanteks take | All fans are powered by a Corsair iCUE Commander Core XT capable of 4.5A. The Phanteks take 1.58W maximum for a total of 3.16W. The Noctuas take 1.68W maximum for a total of 3.36W. The four fans thus max out at 6.52W, 0.543A at 12V. In addition, the Corsair powers four LED strips at 1.835W each, for a total of 7.34W, 1.468A at 5V, and also the 1.56W (0.13A) NF-A14 on the front. The total 5V+12V draw is thus 2.141A. | ||
The aquacomputer runs off USB, reporting through a proprietary protocol =\. | The aquacomputer runs off USB, reporting through a proprietary protocol =\. | ||
| Line 73: | Line 87: | ||
* 2xNoctua chromax NF-F12 (intake) | * 2xNoctua chromax NF-F12 (intake) | ||
* Phanteks T30 (intake) | * Phanteks T30 (intake) | ||
These are all powered off a Gelid Codi6, itself powered off SATA. | |||
====Bottom==== | ====Bottom==== | ||
| Line 78: | Line 94: | ||
* Hardware Labs XFLOW 240 | * Hardware Labs XFLOW 240 | ||
* 2x Noctua NF-P12 redux-1700 (pull) | * 2x Noctua NF-P12 redux-1700 (pull) | ||
All fans are powered by FAN5's two 1A headers, using two 1-to-2 splitters. The Phanteks take | All fans are powered by FAN5's two 1A headers, using two 1-to-2 splitters. The Phanteks take 1.58W maximum for a total of 3.16W. The Noctuas take 1.08W maximum for a total of 2.16W. The four fans thus max out at 10.8W, 0.9A at 12V. The Noctuas provide 120.2m³/h and 2.83mm H₂O each. The Phanteks provide 114m³/h and 3.3mm H₂O each. | ||
==Complete list of attachments== | ==Complete list of attachments== | ||
| Line 168: | Line 184: | ||
===Control=== | ===Control=== | ||
Pump 5A and 5B cannot be controlled independently, nor can Pump 6A and Pump 6B. | |||
CPU0 can only use the CPU temperature as its control. | |||
{| class="wikitable sortable" | {| class="wikitable sortable" | ||
! Source !! Input !! Destination !! Outputs | ! Source !! Input !! Destination !! Outputs | ||
|- | |||
| CPU0 || CPU || Dual XTOP D5s || PWM | |||
|- | |- | ||
| CPU1 || Coolant (mobo) || Silverstone || PWM | | CPU1 || Coolant (mobo) || Silverstone || PWM | ||
| Line 175: | Line 196: | ||
| SYS1 || Coolant (mobo) || 12V hub || PWM | | SYS1 || Coolant (mobo) || 12V hub || PWM | ||
|- | |- | ||
| SYS2 || || || | | SYS2 || Coolant (mobo) || 2x Noctua NF-P12 redux-1700 || 12V, PWM | ||
|- | |- | ||
| Pump 5A || Coolant (mobo) || | | Pump 5A || Coolant (mobo) || Phanteks T30 || 12V, PWM | ||
|- | |- | ||
| Pump 5B || Coolant (mobo) || | | Pump 5B || Coolant (mobo) || Phanteks T30 || 12V, PWM | ||
|- | |- | ||
| Pump 6A || || || | | Pump 6A || Coolant (mobo) || Noctua NF-F12 || PWM, 12V | ||
|- | |- | ||
| Pump 6B || | | Pump 6B || || || | ||
|- | |- | ||
| Silverstone || CPU1 PWM || | | Silverstone || CPU1 PWM || 4x Phanteks T30, 2x EK-Vardar, Noctua NF-A12x25, 2x Noctua NF-A8, Noctua NF-F12 || 12V, PWM | ||
|- | |- | ||
| 12V hub || SYS1 PWM || 2x NF-F12 iPPC-2000, NF-F12 iPPC-3000 || 12V, PWM | | 12V hub || SYS1 PWM || 2x NF-F12 iPPC-2000, NF-F12 iPPC-3000 || 12V, PWM | ||
|- | |- | ||
| Corsair || Coolant (Corsair) || 2x Phanteks T30, 2x Noctua NF-A12x25, Noctua NF-A14 || 12V, PWM | | Corsair || Coolant (Corsair) || 2x Phanteks T30, 2x Noctua NF-A12x25, 2x Noctua NF-A14 || 12V, PWM | ||
|- | |- | ||
|} | |} | ||
==Bespoke parts== | ==Bespoke parts== | ||
I've got a number of self-designed 3d-printed (using my [[Voxel]]) parts in the machine. The OpenSCAD source for all such objects is available on [https://github.com/dankamongmen/openscad-models GitHub]. | I've got a number of self-designed 3d-printed (using my old [[Voxel]], or my newer [[Qidi]]) parts in the machine. The OpenSCAD source for all such objects is available on [https://github.com/dankamongmen/openscad-models GitHub]. | ||
<gallery> | <gallery> | ||
File:Xtopbrace.jpg|Front mount for XTOP Dual D5 | File:Xtopbrace.jpg|Front mount for XTOP Dual D5 (Hatchbox PLA) | ||
File:3dprinted-xtopmountfront.jpg|Back | File:3dprinted-xtopmountfront.jpg|Rear mount for XTOP Dual D5 (Hatchbox PLA) | ||
File:3dprinted-cableback.jpg|Rear cable shroud | File:Backbrace.jpg|Back cover for XTOP Dual D5 (Atomic Filament PETG) | ||
File:3dprinted-cablefront.jpg|Front cable shroud | File:3dprinted-cableback.jpg|Rear cable shroud (Atomic Filament PLA) | ||
File:Cablebracket.jpg|PCIe slot cover with cable guide | File:3dprinted-cablefront.jpg|Front cable shroud (Atomic Filament PLA) | ||
File:Birdcover.jpg|Antenna mount covering Quantum FLT brackets | File:Cablebracket.jpg|PCIe slot cover with cable guide (Hatchbox PLA) | ||
File:Birdcover.jpg|Antenna mount covering Quantum FLT brackets (Hatchbox PLA) | |||
File:VAMOLED.jpg|Enclosure for [[Waveshare_AMOLED|Waveshare 5.5" AMOLED]] (Atomic Filament carbon fiber PETG) | |||
File:Molexplug.jpg|Plug with a Molex-sized channel (Hatchbox PLA) | |||
File:Molexplug-installed.jpg|The installed plug allows LED light through | |||
File:Cpuplug.jpg|Shroud for CPU power cables + fan cables (Atomic Filament PLA) | |||
File:Cage-shroud.jpg|Shroud for PSU-side disk cages (Atomic Filament PLA) | |||
File:Moboshroud.jpg|Shroud for motherboard-side disk enclosures (Atomic Filament CF-PETG and PLA) | |||
</gallery> | </gallery> | ||
===Project Pompidou=== | |||
My cabling situation on the PSU side is a mess. Inspired by the [https://en.wikipedia.org/wiki/Centre_Pompidou Centre Pompidou], I'm going to design and print skychannels in which to run the power cables. Ideally, none of them will be seen. To do this, I need: | |||
* Channel ends which bind to the various PSU plugs | |||
* Channels into which I can lay the cables, probably doubling them up. These channels will need run from the PSU to their targets. | |||
* Something at the hookup points | |||
==External links== | |||
* [https://imgur.com/a/cl9Yf Project M8] by [https://www.reddit.com/user/p0Pe/ u/p0Pe] appears to have done something very similar to the Pompidou Project a full decade ago. nice work. | |||
[[CATEGORY: Hardware]] | [[CATEGORY: Hardware]] | ||
Latest revision as of 07:46, 12 September 2022

Soon after completing Schwarzgerät III, it became clear that I had made some errors. Most critically, the two cooling complexes on the bottom ought have been blowing into the machine rather than out, and the XFLOW240 radiator on the bottom of the PSU side ought have been inverted. In addition, the Phanteks T30 fan had just been released, and showed superior noise-performance characteristics relative to any existing Noctua product. Finally, I bit the bullet and upgraded to a 1000W PSU (from the 850W incarnation of the same EVGA Supernova T2 Titanium line).
Summary of changes

- New hardware:
- Added 12V RGB+fan hub to the top of the PSU side
- Added Aquantia AQC107 10Gbps NIC.
- Added aquacomputer NEXT sensor.
- Added EKWB XTOP Dual D5 pumps and housing (measured at 35mL volume).
- Added another 4-drive bay to the mobo side, replacing a Caselabs hard drive cage from the PSU side.
- Added PCIe 1x card exposing an internal 19-pin USB3 header and 2 external USB3 Type-A ports.
- Added Gelid CODI6 PWM+ARGB hub.
- Cooling:
- Added six Phanteks T30 fans and moved some others around.
- Flipped bottom cooling complexes to blow inside the case (up) rather than outside (down), as there otherwise wasn't enough air flowing into the machine.
- Inverted PSU-side XFLOW, and shortened associated coolant tubes.
- Added drain port to bottom of PSU side, at the loop's true lowest point.
- Added intake port high on mobo side.
- Moved DiyHZ sensor above the video card.
- Inserted NEXT where DiyHZ had been.
- Added XTOP Dual D5 pumps behind where Monsoon had been.
- Structure:
- Designed and printed pci bracket with cable guide.
- Designed and printed cable shroud for mobo side.
- Designed and printed sliding brace for XTOP.
- Power: Upgraded to a 1000W supply, eliminating the need for my jury-rigged 12V+5V Molexen.
- Removed hardware:
- Removed unused IcyDock 4x2.5" enclosure, freeing up 4x SATA data and 1x SATA power.
- Removed second LSI SAS card, which was no longer needed.
- Removed 4x140mm fans and associated brace from top.
- Removed Monsoon reservoir+pump combo.
- Moved Vario pump into Quantum Kinetic FLT, replacing dead PWM D5 pump.
New cooling configuration

Coolant temperatures are sampled at both reservoirs. The Monsoon sensor feeds into the Corsair, while the Quantum sensors feeds into the motherboard. Ambient temperatures are sampled via two sensors immediately outside the rear of the motherboard side, towards the bottom. One feeds into the Corsair, and one feeds into the motherboard. Currently, all PWM is then controlled based off absolute coolant temperature, but ideally it would be controlled using the difference between coolant and ambient temperatures.
Mobo side
Bottom
- 2x Phantek T30 (push)
- Hardware Labs XFLOW 240
- 2x Noctua NF-A12x25 (pull)
- aquacomputer NEXT sensor
The Noctuas provide 102.1m³/h and 2.34mm H₂O each. The Phanteks provide 114m³/h and 3.3mm H₂O each.
All fans are powered by a Corsair iCUE Commander Core XT capable of 4.5A. The Phanteks take 1.58W maximum for a total of 3.16W. The Noctuas take 1.68W maximum for a total of 3.36W. The four fans thus max out at 6.52W, 0.543A at 12V. In addition, the Corsair powers four LED strips at 1.835W each, for a total of 7.34W, 1.468A at 5V, and also the 1.56W (0.13A) NF-A14 on the front. The total 5V+12V draw is thus 2.141A.
The aquacomputer runs off USB, reporting through a proprietary protocol =\.
Top
- 2 EK-Vardar EVO 120ER Black (push)
- Hardware Labs HWL GTS360
- Noctua NF-A12x25 (push)
The EK-Vardars require 4.46W each, for a total of 8.92W, 0.74A at 12V. The Noctua requires 1.68W, another 0.14A at 12V, for a total of 0.88A. The EK-Vardars provide 77m³/h and 3.16mm H₂O. The Noctua provides 102.1m³/h and 2.34mm H₂O.
These fans are all powered via a Silverstone fan splitter, itself powered via SATA.
Front
- Noctua chromax NF-A14 (intake)
- EKWB XTOP dual D5
The D5 pumps are powered off independent SATA hookups.
Back
- EKWB Quantum Kinetic 240FLT D5 pump + reservoir
- Phanteks T30 (intake)
- DiyHZ sensor
The DiyHZ runs off the RGB hub, and is strictly visual: it does not report its measurements.
PSU side
Top
- 2x Phanteks T30 (push)
- Noctua NF-F12 iPPC-3000 (push)
- Hardware Labs GTR360
- 2x Noctua NF-F12 iPPC-2000 (pull)
These three fans are powered by the 12V RGB hub on the top. In addition, the RGB hub provides power for several feet of S5050 LEDs. I'm not sure about their exact power draw, but neither am I certain about the rating of this no-name passive hub, so I guess I just hope it doesn't catch fire.
Front
- Noctua NF-A14 (intake)
- 2xNoctua chromax NF-F12 (intake)
- Phanteks T30 (intake)
These are all powered off a Gelid Codi6, itself powered off SATA.
Bottom
- 2x Phantek T30 (push)
- Hardware Labs XFLOW 240
- 2x Noctua NF-P12 redux-1700 (pull)
All fans are powered by FAN5's two 1A headers, using two 1-to-2 splitters. The Phanteks take 1.58W maximum for a total of 3.16W. The Noctuas take 1.08W maximum for a total of 2.16W. The four fans thus max out at 10.8W, 0.9A at 12V. The Noctuas provide 120.2m³/h and 2.83mm H₂O each. The Phanteks provide 114m³/h and 3.3mm H₂O each.
Complete list of attachments
- EKWB EK-AF ball valve
- EKWB Quantum Torque T-valve
- 2x EKWB Quantum Torque micro 90° MF
- 4x EKWB Quantum Torque compression fittings
- 4x EKWB Quantum Torque 6mm MM
- 3x EKWB Quantum Torque 45° rotating MF
- 4x EKWB Quantum Torque 90° rotating MF
- EKWB Quantum Torque 28mm MF
- EKWB EK-AF 50mm MF
- 2x EKWB EK-AF 20mm MF
- EKWB EK-AF 30mm MF
- Bitspower 90° rotating MM
- Bitspower 90° rotating MF
- Bitspower 90° FF
- Bitspower MM
- 2x Bitspower drain ports
- Bitspower rotating MM
4x SDTC Tech 5mm MM
One of these cheap SDTC extenders ruthlessly stripped the threads from my Monsoon Series Two. I strongly recommend against their use.
Fans
All fans are 12V. The Phanteks T30s have an "Advanced" switch enabling 3000RPM, but I am not using it. All values listed are maxima; I am typically running them well below these settings. All radiators save the GTR360 are using push+pull. All fans are controlled via PWM.
Blowing in
| Model | Location | RPM | dB(A) | m³/h | mm H₂O | Amps/Watts | Hookup |
|---|---|---|---|---|---|---|---|
| Noctua NF-A12x25 | Mobo XFLOW (pull) | 2000 | 22.6 | 102.1 | 2.34 | 0.14 / 1.68 | Corsair |
| Noctua NF-A12x25 | Mobo XFLOW (pull) | 2000 | 22.6 | 102.1 | 2.34 | 0.14 / 1.68 | Corsair |
| Phanteks T30 | Mobo XFLOW (push) | 2000 | 27.3 | 114 | 3.30 | 0.132 / 1.58 | Corsair |
| Phanteks T30 | Mobo XFLOW (push) | 2000 | 27.3 | 114 | 3.30 | 0.132 / 1.58 | Corsair |
| Noctua NF-P12 redux 1700 | PSU XFLOW (pull) | 1700 | 25.1 | 120.2 | 2.83 | 0.09 / 1.08 | Mobo |
| Noctua NF-P12 redux 1700 | PSU XFLOW (pull) | 1700 | 25.1 | 120.2 | 2.83 | 0.09 / 1.08 | Mobo |
| Phanteks T30 | PSU XFLOW (push) | 2000 | 27.3 | 114 | 3.30 | 0.132 / 1.58 | Mobo |
| Phanteks T30 | PSU XFLOW (push) | 2000 | 27.3 | 114 | 3.30 | 0.132 / 1.58 | Mobo |
| Noctua NF-A14 | Mobo front | 1500 | 24.6 | 140.2 | 2.08 | 0.13 / 1.56 | Corsair |
| Phanteks T30 | Mobo back | 2000 | 27.3 | 114 | 3.30 | 0.132 / 1.58 | 12V hub |
| Phanteks T30 | PSU front | 2000 | 27.3 | 114 | 3.30 | 0.132 / 1.58 | Codi6 |
| Noctua NF-A14 | PSU front | 1500 | 24.6 | 140.2 | 2.08 | 0.13 / 1.56 | Codi6 |
| Noctua NF-F12 | PSU front | 1500 | 22.4 | 93.4 | 2.61 | 0.05 / 0.6 | Codi6 |
| Noctua NF-F12 | PSU front | 1500 | 22.4 | 93.4 | 2.61 | 0.05 / 0.6 | Codi6 |
Blowing out
| Model | Location | RPM | dB(A) | m³/h | mm H₂O | Amps/Watts | Hookup |
|---|---|---|---|---|---|---|---|
| Phanteks T30 | GTS360 (pull) | 2000 | 27.3 | 114 | 3.30 | 0.132 / 1.58 | Silverstone |
| Phanteks T30 | GTS360 (pull) | 2000 | 27.3 | 114 | 3.30 | 0.132 / 1.58 | Silverstone |
| Phanteks T30 | GTS360 (pull) | 2000 | 27.3 | 114 | 3.30 | 0.132 / 1.58 | Silverstone |
| EK-Vardar EVO 120ER Black | GTS360 (push) | 2200 | 33.5 | 77 | 3.16 | 0.372 / 4.46 | Silverstone |
| Noctua NF-A12x25 | GTS360 (push) | 2000 | 22.6 | 102.1 | 2.34 | 0.14 / 1.68 | Silverstone |
| EK-Vardar EVO 120ER Black | GTS360 (push) | 2200 | 33.5 | 77 | 3.16 | 0.372 / 4.46 | Silverstone |
| Noctua NF-F12 iPPC-2000 | GTR360 (push) | 2000 | 29.7 | 121.8 | 3.94 | 0.1 / 1.2 | 12V hub |
| Noctua NF-F12 iPPC-3000 | GTR360 (push) | 3000 | 43.5 | 186.7 | 7.63 | 0.3 / 3.6 | 12V hub |
| Noctua NF-F12 iPPC-2000 | GTR360 (push) | 2000 | 29.7 | 121.8 | 3.94 | 0.1 / 1.2 | 12V hub |
| Noctua NF-A8 | Enclosure 1 | 2200 | 17.7 | 55.5 | 2.37 | 0.08 / 0.96 | Silverstone |
| Noctua NF-A8 | Enclosure 2 | 2200 | 17.7 | 55.5 | 2.37 | 0.08 / 0.96 | Silverstone |
Control
Pump 5A and 5B cannot be controlled independently, nor can Pump 6A and Pump 6B. CPU0 can only use the CPU temperature as its control.
| Source | Input | Destination | Outputs |
|---|---|---|---|
| CPU0 | CPU | Dual XTOP D5s | PWM |
| CPU1 | Coolant (mobo) | Silverstone | PWM |
| SYS1 | Coolant (mobo) | 12V hub | PWM |
| SYS2 | Coolant (mobo) | 2x Noctua NF-P12 redux-1700 | 12V, PWM |
| Pump 5A | Coolant (mobo) | Phanteks T30 | 12V, PWM |
| Pump 5B | Coolant (mobo) | Phanteks T30 | 12V, PWM |
| Pump 6A | Coolant (mobo) | Noctua NF-F12 | PWM, 12V |
| Pump 6B | |||
| Silverstone | CPU1 PWM | 4x Phanteks T30, 2x EK-Vardar, Noctua NF-A12x25, 2x Noctua NF-A8, Noctua NF-F12 | 12V, PWM |
| 12V hub | SYS1 PWM | 2x NF-F12 iPPC-2000, NF-F12 iPPC-3000 | 12V, PWM |
| Corsair | Coolant (Corsair) | 2x Phanteks T30, 2x Noctua NF-A12x25, 2x Noctua NF-A14 | 12V, PWM |
Bespoke parts
I've got a number of self-designed 3d-printed (using my old Voxel, or my newer Qidi) parts in the machine. The OpenSCAD source for all such objects is available on GitHub.
-
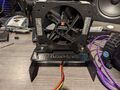 Front mount for XTOP Dual D5 (Hatchbox PLA)
 -
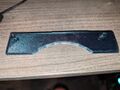 Rear mount for XTOP Dual D5 (Hatchbox PLA)
 -
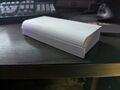 Back cover for XTOP Dual D5 (Atomic Filament PETG)
 -
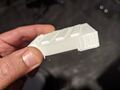 Rear cable shroud (Atomic Filament PLA)
 -
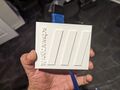 Front cable shroud (Atomic Filament PLA)
 -
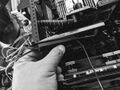 PCIe slot cover with cable guide (Hatchbox PLA)
 -
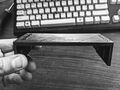 Antenna mount covering Quantum FLT brackets (Hatchbox PLA)
 -
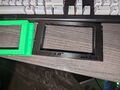 Enclosure for Waveshare 5.5" AMOLED (Atomic Filament carbon fiber PETG)
 -
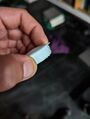 Plug with a Molex-sized channel (Hatchbox PLA)
 -
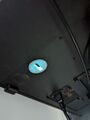 The installed plug allows LED light through
 -
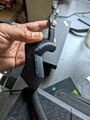 Shroud for CPU power cables + fan cables (Atomic Filament PLA)
 -
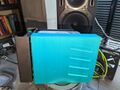 Shroud for PSU-side disk cages (Atomic Filament PLA)
 -
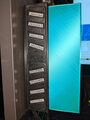 Shroud for motherboard-side disk enclosures (Atomic Filament CF-PETG and PLA)


Project Pompidou
My cabling situation on the PSU side is a mess. Inspired by the Centre Pompidou, I'm going to design and print skychannels in which to run the power cables. Ideally, none of them will be seen. To do this, I need:
- Channel ends which bind to the various PSU plugs
- Channels into which I can lay the cables, probably doubling them up. These channels will need run from the PSU to their targets.
- Something at the hookup points
External links
- Project M8 by u/p0Pe appears to have done something very similar to the Pompidou Project a full decade ago. nice work.